
- WHO: Project Manager / Status Manager
- WHERE: Project Online/Project Server PWA
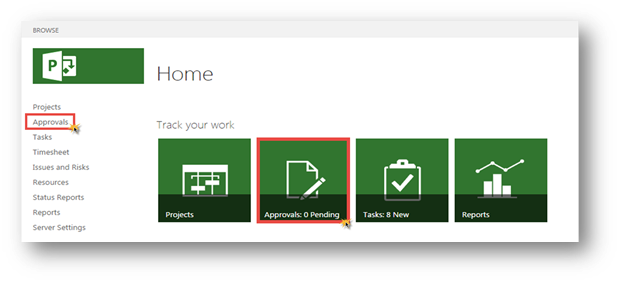
TO ACCESS THE ‘APPROVAL CENTER’:
- Access the ‘Approval Center’ by:
- Navigating to your Project Online environment.
- From the Quick Launch Menu, click the Approvals link (or ‘Approvals’ tile, if visible) to access Project Online’s ‘Approval Center’.
TO CREATE AN ‘AUTO-APPROVAL’ RULE:

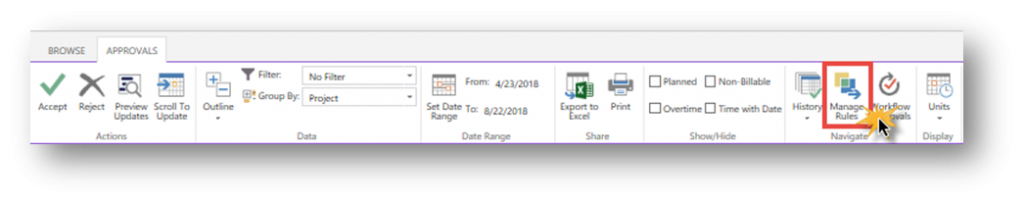
2. From the Approval Center, click the ‘Manage Rules’ button located on the ‘Navigate’ section of the ‘Approvals’ menu ribbon in PWA.
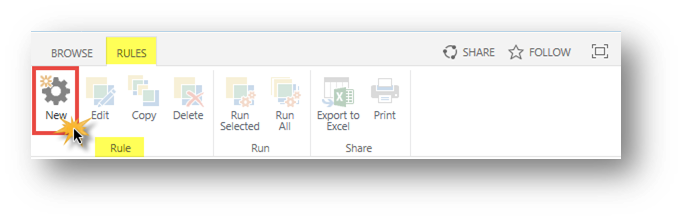
3. On the Rules page, when creating a new rule, click the New button, located in the ‘Rule’ section of the Rules menu ribbon.
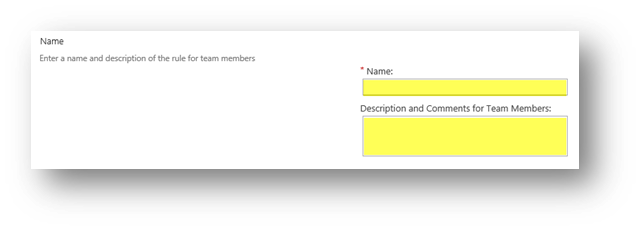
4. Name the rule by navigating to the Edit/Create Rule page and entering a Name and an optional Description of the rule.
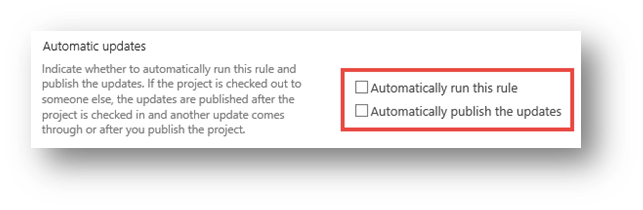
5. Select ‘Automatic Update’ preferences to indicate whether to automatically run this rule and/or automatically publish the updates.

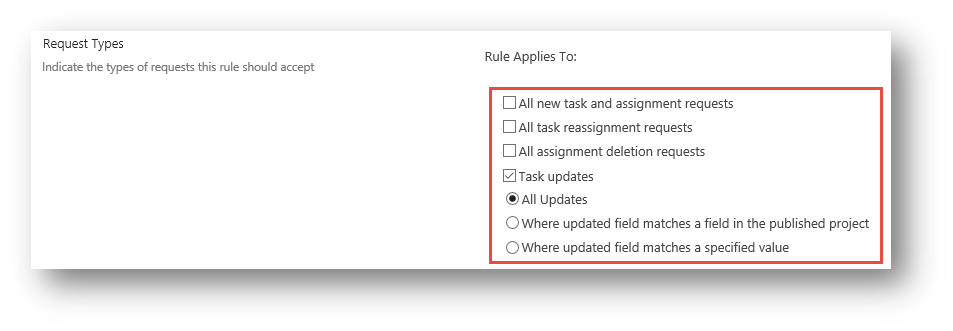
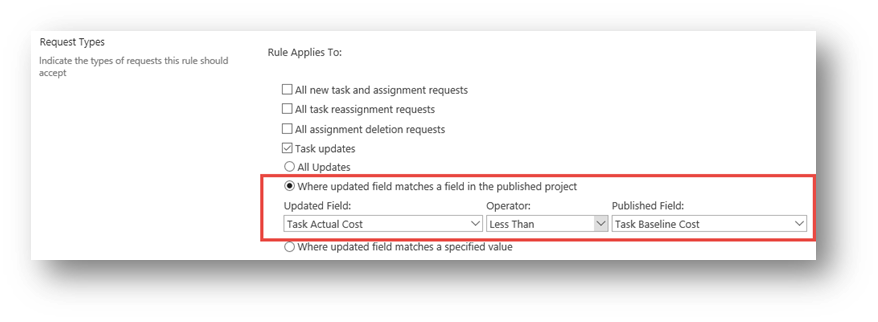
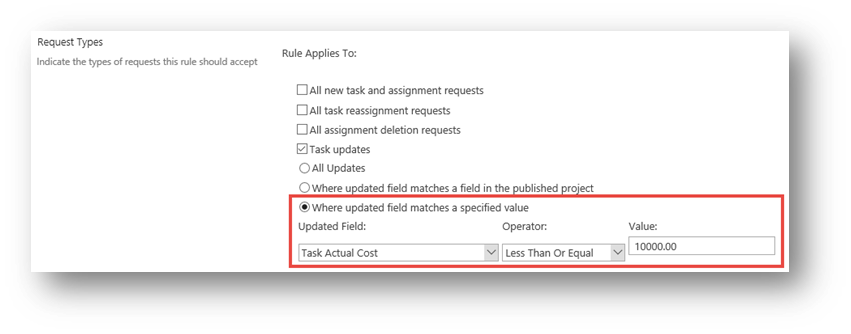
6. Select the ‘Request (Update) Type(s)’ to indicate the types of requests/updates this rule should accept


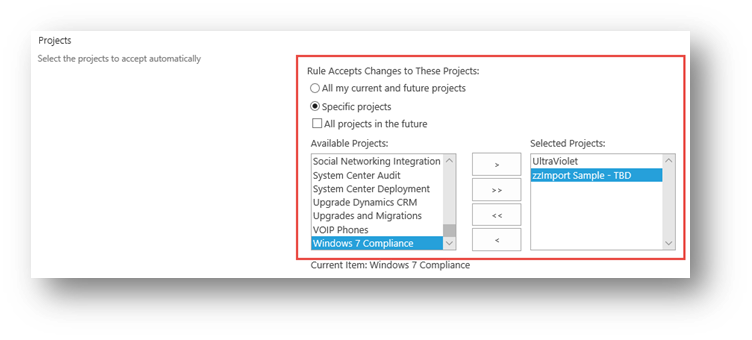
7. Select the Project(s) to be processed automatically
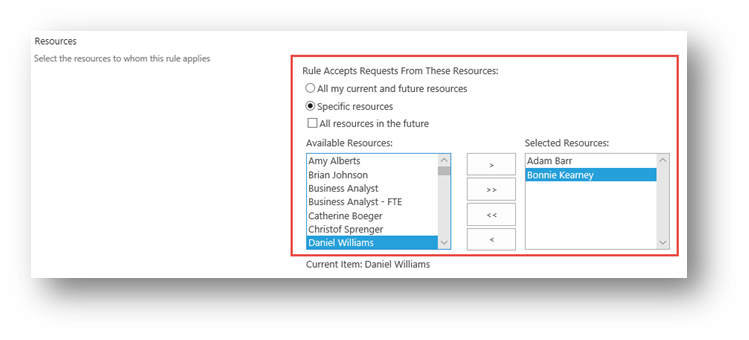
8. Select the Resource(s) to be processed automatically.
9. Click the Save button to create or save edits made to an existing rule
To learn more on using ‘Auto Approval’ Rules for Task Updates in Project Server and Project Online, be sure to check out these other articles:
- Auto-Approval’ Rules Overview
- Running a Pre-Defined ‘Auto-Approval’ Rule
- Copying an Existing ‘Auto-Approval’ Rule
- Deleting an Existing ‘Auto-Approval’ Rule
For more information on how we can help you and your project management team, send us an email
If you are looking to kick start your project management journey, sign up for our Microsoft Training Classes. We hope you find this blog post helpful. For more tips and tricks on Project Management, follow us on LinkedIn and Instagram
GAIN VISIBILITY WITH PPMVUE
Bring your Project Online data to life with PPMVUE.
Create dashboards and reports for Portfolios, Projects and more in few clicks. Ready to use out of the box and works with any configuration
Download From Office Store Learn More