
With the use of Project Online, a common question is how Project Managers can control when project resources submit task updates or charge time, via timesheets, to their projects. For example, if a task, with dependencies is scheduled to start 4 months in the future, and the project resource has access to the task in either their timesheets or Task Center, they are able to submit time against that task. Once the project schedule is updated with the submitted task update, then the Actual Start Date will be set to the start date submitted by the project resource, which pulls that task 4 months earlier than planned, along with any dependent tasks, which could have several negative impacts to the project schedule.
There are 2 (two) methods within Project Online/Server where Project Managers lock (or close) tasks to updates. The 2 methods are as follows:
- In MS Project Professional: Insert the ‘Locked’ field into one of the ‘Gantt Chart’ views and change from ‘No’ to ‘Yes’ on the appropriate task(s) to lock the task assignment(s), then publish the project. NOTE: This is a toggle, so the ‘Locked’ field can be changed back and forth (between ‘Yes’ and ‘No’ as needed);
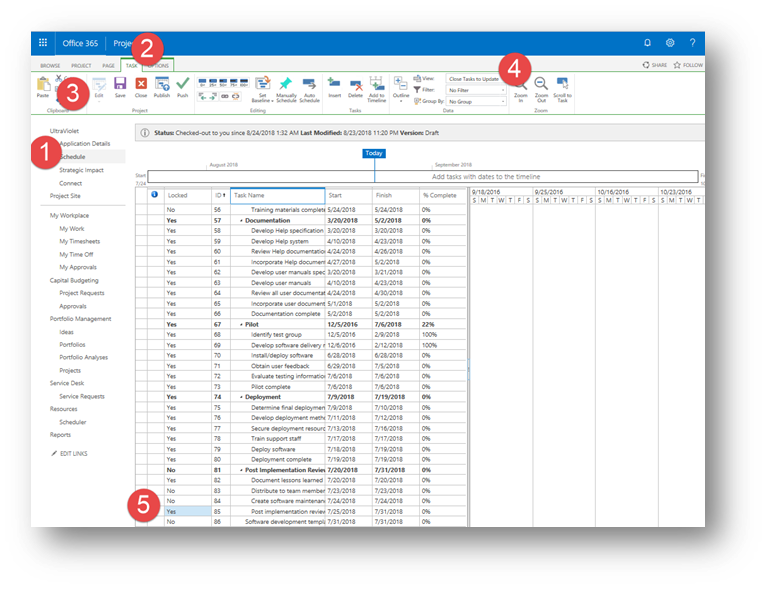
- In PWA: Select the project and check it out for editing, then navigate to the ‘Schedule’ PDP, and select the ‘Close Task to Updates’ view. In the ‘Close Task to Updates’ view, there is a ‘Locked’ column presented (the 1st column in the view). Change the ‘Locked’ column from ‘No’ to ‘Yes’ on the appropriate task(s). NOTE: As with the ‘Locked’ field in MS Project Professional, the ‘Locked’ column is a toggle as well, and can be changed, as needed.
‘Lock’ or ‘Close’ Tasks in MS Project Professional from PWA
Tasks can be locked (or unlocked) in MS Project Professional, via the ‘Locked’ field. The ‘Locked’ field can be updated from ‘Yes’ to ‘No’ to lock or unlock, respectively, the associated task. Once the project schedule is published, then locked tasks (Locked = No) will be removed from the assigned resource’s timesheets (if enabled) and/or ‘Task Center’ assignment views.
To ‘lock’ (or unlock) tasks in MS Project Professional launched from PWA:
Access the ‘Project Center’
- Navigate to your Project Online environment
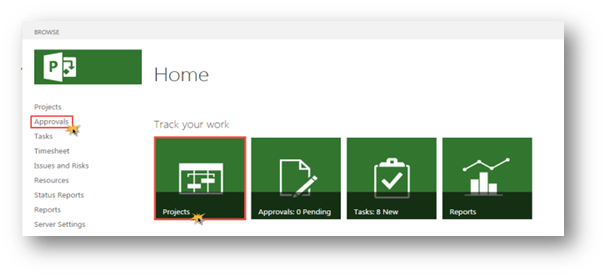
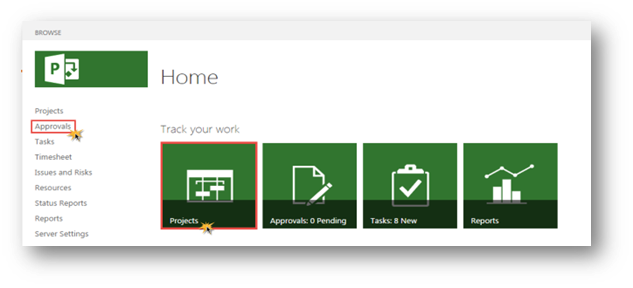
- Click the Projects link (or tile) to access the ‘Project Center’
Launch MS Project (Professional) from PWA
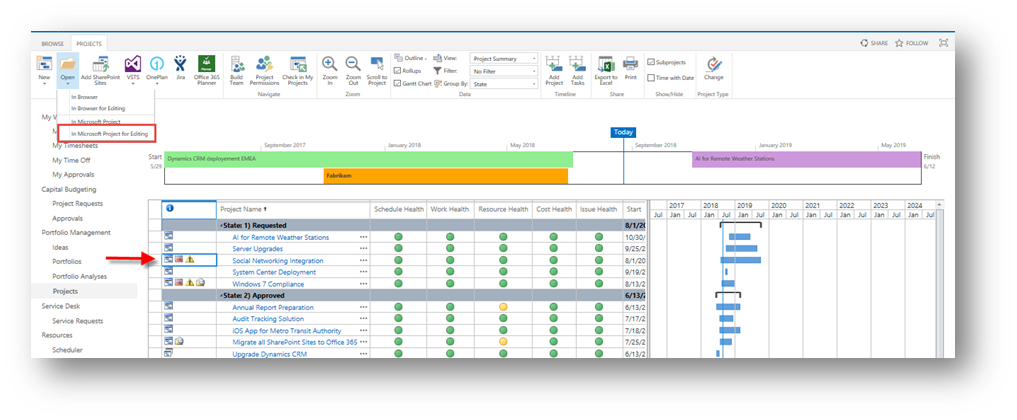
- In Project Online’s ‘Project Center’, navigate to and select the project to be updated, then select Open, then In Microsoft Project for Editing, located on the ‘Projects’ tab, in the ‘Project’ section.
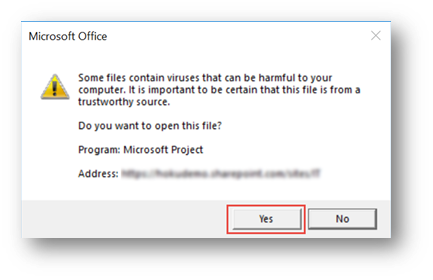
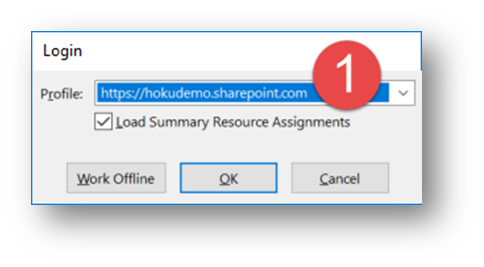
- When prompted, click OK to open the selected project in MS Project Professional.
Lock (or Unlock) Desired Tasks
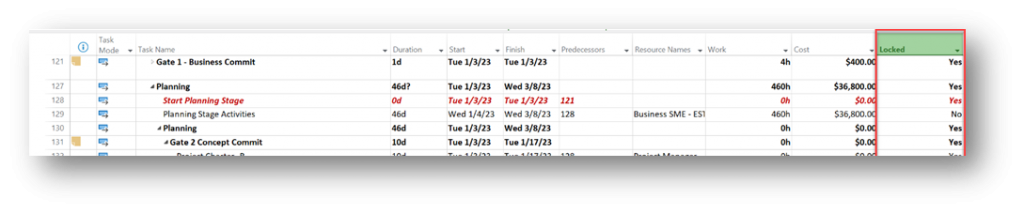
- With the selected project open, navigate to one of the Gantt Chart views, and insert the ‘Locked’ column.
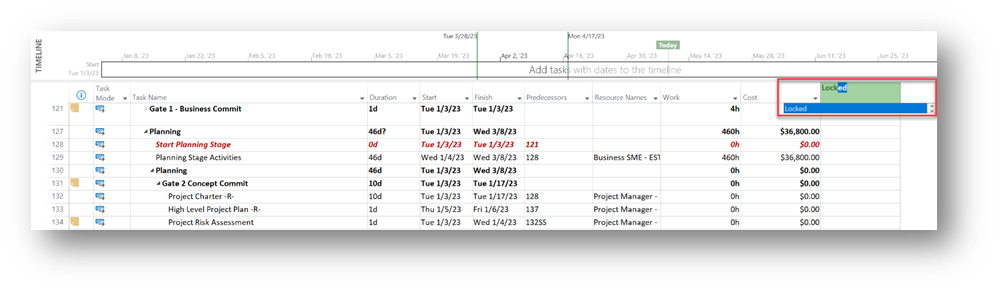

- Update the Locked field to ‘Yes’ for the tasks to be closed, or ‘No’ for the tasks to be opened.
- Once the desired tasks have been locked (or unlocked), then save and publish the project schedule by clicking File, then click the Publish button.

- Close and check the project after all updates have been completed.
‘Lock’ or ‘Close’ Tasks in MS Project Professional (from Desktop)
Tasks can be locked (or unlocked) in MS Project Professional, via the ‘Locked’ field. The ‘Locked’ field can be updated from ‘Yes’ to ‘No’ to lock or unlock, respectively, the associated task. Once the project schedule is published, then locked tasks (Locked = Yes) will be removed from the assigned resource’s timesheets (if enabled) and/or ‘Task Center’ assignment views.
To ‘lock’ (or unlock) tasks in MS Project Professional launched from your desktop:
Launch MS Project (Professional)
- Launch MS Project (Professional) from your desktop and connect to the desired Project Online/Server environment.
Open the Project to be Updated
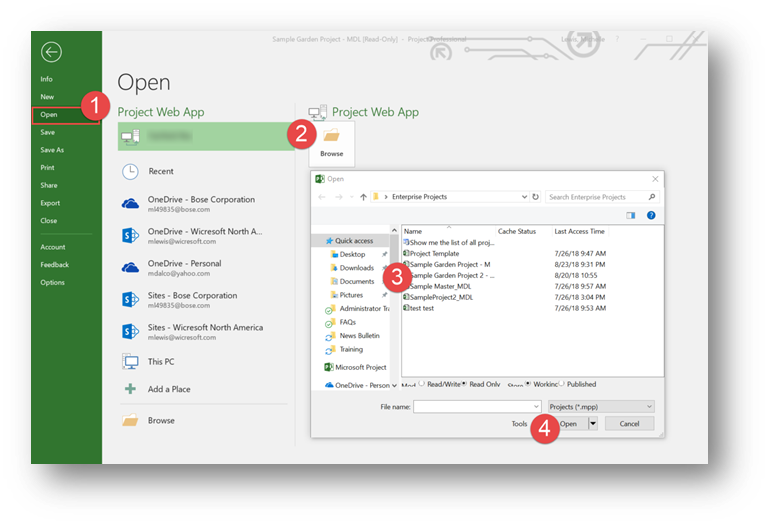
- With MS Project Professional open, locate and open the desired enterprise project by:
- Click Open from the MS Project launch pane
- Click Browse to browse available project schedules
- Locate the desired project schedule
- Click Open
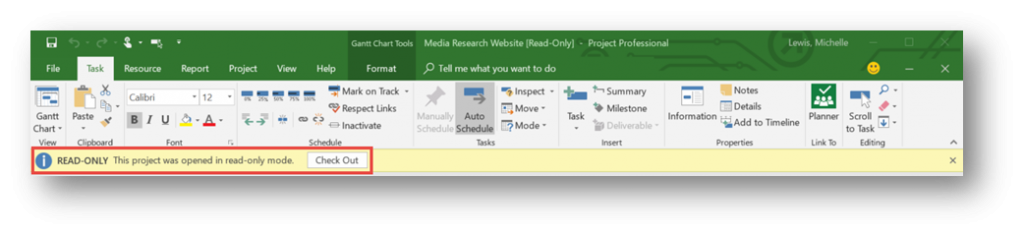
- If the project is opened in read-only mode, click Check Out to open the project for editing.
Lock (or Unlock) Desired Tasks
- With the selected project open, navigate to one of the Gantt Chart views, and insert the ‘Locked’ column.

- Update the Locked field to ‘Yes’ for the tasks to be closed, or ‘No’ for the tasks to be opened.
- Once the desired tasks have been locked (or unlocked), then save and publish the project schedule by clicking File, then click the Publish button.
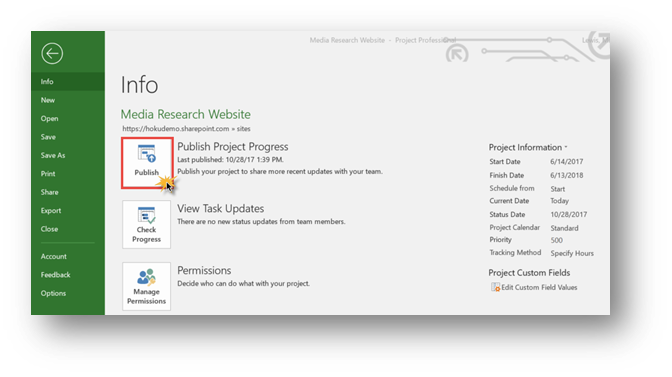
- Close and check the project after all updates have been completed.
‘Lock’ or ‘Close’ Tasks in PWA
Tasks can be locked (or unlocked) in MS Project Online/Server, via the ‘Close Task to Updates’ view, found in the ‘Schedule PDP’. The ‘Locked’ field can be updated from ‘No’ to ‘Yes’ to lock or unlock, respectively, the associated task. Once the project schedule is published, then locked tasks (Locked = Yes)will be removed from the assigned resource’s timesheets (if enabled) and/or ‘Task Center’ assignment views.
Note: When locking tasks In MS Project Online/Server, via the ‘Close Task to Updates’ view, the locked tasks will only be removed from the assigned resource’s timesheets and/or ‘Task Center’ assignment views. The locked/closed tasks will still be visible in Project Online/Server’s ‘Resource Assignment’ views for capacity planning and demand management purposes.
To ‘lock’ (or unlock) tasks in PWA:
Access the Project Center
- Navigate to your Project Online environment, via PWA.
- In PWA, click the ‘Project‘ link in the Quick Launch menu (or ‘Project’ tile) to navigate to the ‘Project Center’.
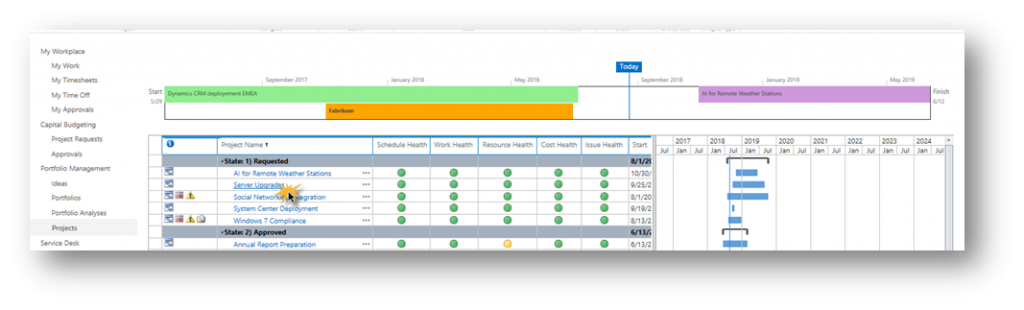
- From the ‘Project Center’, locate and select the project to be updated by clicking the associated link in the ‘Project Name’ column.
Check Out and Edit the Project to be Updated
- Check-Out the selected project for editing by:
- Clicking the ‘Schedule’ link from the PWA Quick Launch menu
- Select the ‘Task’ tab to activate the menu for the ‘Schedule’ PDP (Project Detail Page)
- Click Edit >> In Browser to check out the project for editing
- In the ‘View’ drop-down list, select the ‘Close Tasks to Update’ view
- Navigate to the desired tasks and change the ‘Locked’ field associated with the task to ‘Yes’ to lock the task or ‘No’ to unlock.
Tip: To update multiple tasks, in sequence, click and drag (up or down) the value in the ‘Locked’ column until the desired tasks have been updated.
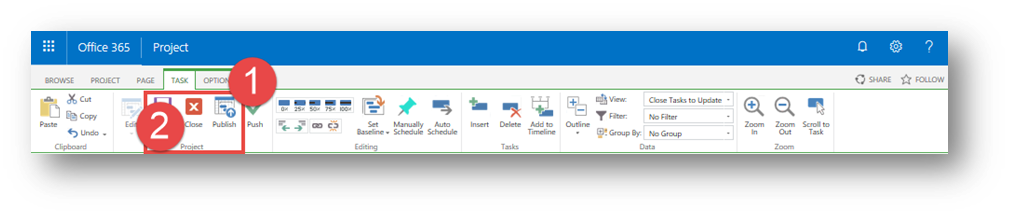
- Save, publish, and check in the updated project schedule, by:
- Clicking the Publish button located on the ‘Task’ tab, in the ‘Project’ section, to save and publish the updated schedule
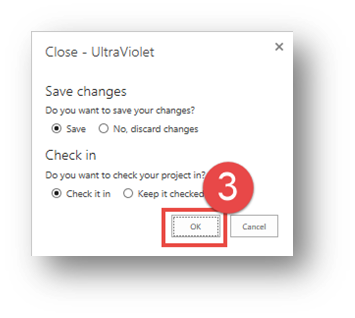
- Clicking the Close button to close the project
- When prompted to check the project schedule, click OK.
Now, that you know how to lock and unlock your tasks. You can be at ease knowing your projects will remain on time and on budget!
EPMA is a global solutions company focused on delivering projects better. Our unique proposition that embodies the full ecosystem and portfolio of any organization has enabled us to deliver projects better and make a significant difference. Our unique and proactive approach of having over 20 developers and solutions architects in the business acts as a true enabler for impact. We are more than ever before positioned to add value, advise, and impact your organization.
Interested in hearing more? Please contact EPMA at 832.772.3762 or email us at [email protected]
GAIN VISIBILITY WITH PPMVUE
Bring your Project Online data to life with PPMVUE.
Create dashboards and reports for Portfolios, Projects and more in few clicks. Ready to use out of the box and works with any configuration
Download From Office Store Learn More