
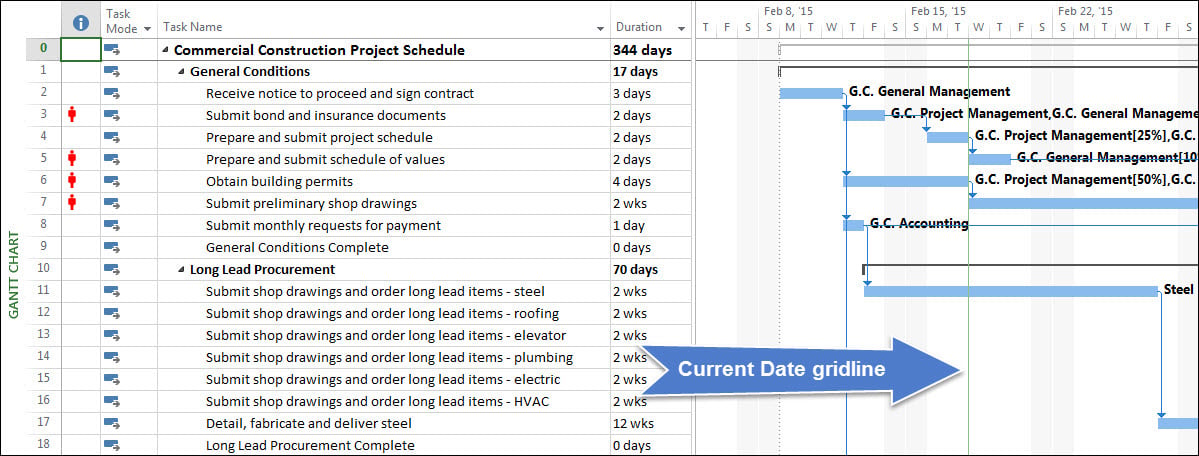
By default, Microsoft Project displays a Current date gridline in the Gantt Chart view. You can see a green Current date gridline displayed on 02-18-15 in the Gantt Chart view shown in Microsoft Project 2013 in the following figure.
By default, Microsoft Project does not display a Status date gridline in the Gantt Chart view. If you regularly specify the Status date in your projects as a part of your project updating process, I believe you will find it very helpful to display a Status date gridline in the Gantt Chart view of your projects.
Note: Before you can display the Status date gridline in the Gantt Chart view, you must actually set a Status date value in each of your projects. To do this, click the Status Date button in the Status section of the Project ribbon, select a date in the Status Date dialog, and then click the OK button.
To display a Status date gridline in the Gantt Chart view, complete the following steps:
1. Apply the Gantt Chart view.
2. Click the Format tab to display the Format ribbon.
3. In the Format section of the Format ribbon, click the Gridlines pick list button and select the Gridlines item on the list. Microsoft Project displays the Gridlines dialog shown in the following figure.
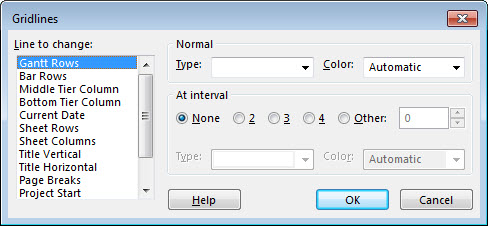
4. In the Gridlines dialog, scroll to the bottom of the Line to change list and select the Status Date item.
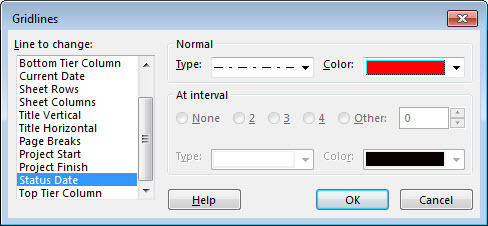
5. In the Normal section of the dialog, click the Type pick list and select one of four line types (I personally like to use the last line type on the Type pick list in Microsoft Project 2013).
6. In the Normal section of the dialog, click the Color pick list and select the color for the gridline (I personally like to use the red color in Microsoft Project 2013).
The following figure shows my settings for displaying the Status date gridline in the Gantt Chart view.
7. In the Gridlines dialog, click the OK button.
Microsoft Project displays a Status date gridline in the Gantt Chart view, such as the one shown in the following figure.

Did this blog post help you? Would you like to learn more about how to effectively use Microsoft Project, Microsoft Project Server, or Project Online to manage your projects? If so, please consider enrolling in one of our upcoming open enrollment training classes.
You can take our training classes “in person” in our EPMA training center in Houston, Texas or “live-virtual” over the Internet. And don’t forget to follow us on Twitter, LinkedIn, and Facebook.
For more details & kick start your project management journey, sign up for our Microsoft Training Classes or send us an email.
I hope you find this blog post helpful. For more tips and tricks on Project Management, please visit www.epmainc.com
GAIN VISIBILITY WITH PPMVUE
Bring your Project Online data to life with PPMVUE.
Create dashboards and reports for Portfolios, Projects and more in few clicks. Ready to use out of the box and works with any configuration
Download From Office Store Learn More