
Many years ago, I was challenged in class one day by a student who claimed that it is only possible to specify one date format in Microsoft Project, which is then applied to every project you open. He pointed out correctly that you specify the Date format setting used by Microsoft Project on the General page of the Project Options dialog, such as shown in the following figure. Notice in the figure that I specified the 1/28/09 date format.
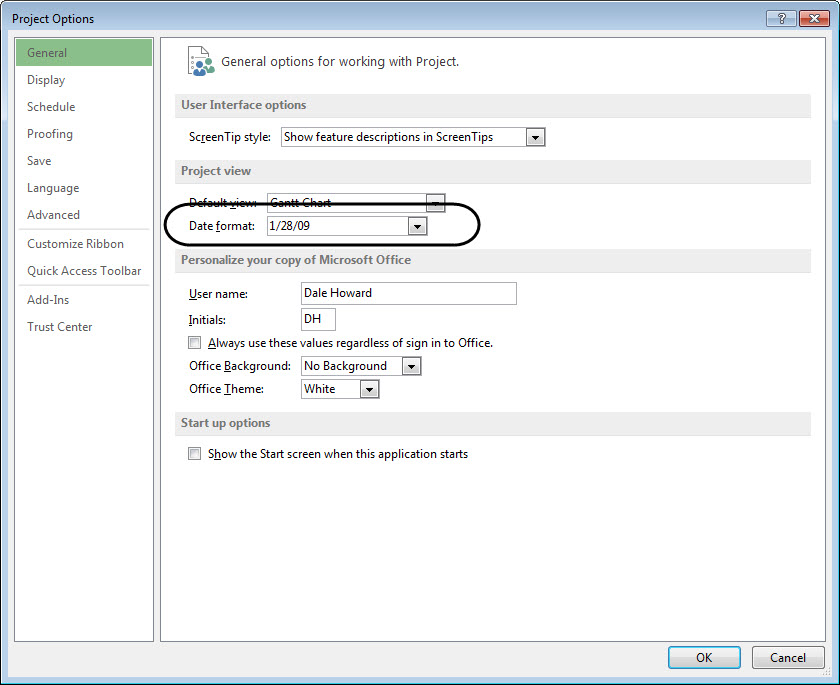
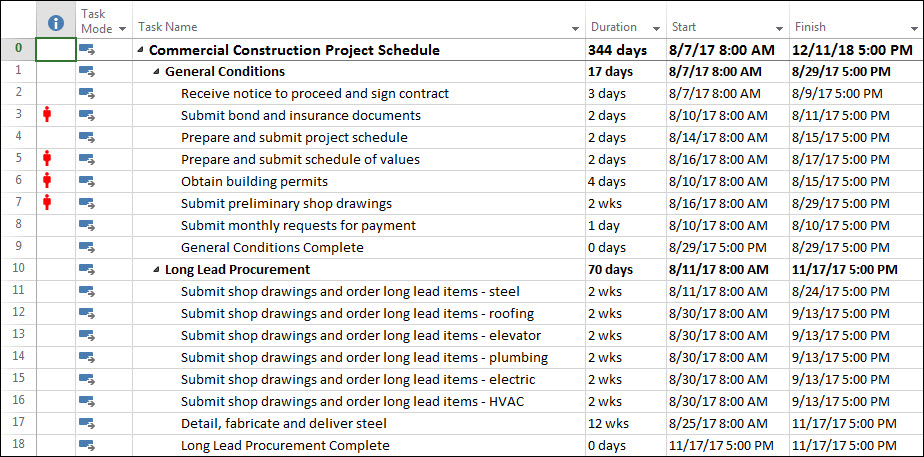
My student was correct in asserting that the date format specified in the Project Options dialog is applied to every project that I open. In fact, you can see that the 1/28/09 date format is applied to the dates in the Start and Finish fields in the Entry table of the project shown in the following figure.

Where my student was wrong was when he said it is not possible to specify an alternate date format in an individual project. In fact, at this point he was not only wrong, he was dead wrong!
There is a little-known feature in Microsoft Project that allows you to specify an alternate date format for any table in a project, as needed. For example, suppose that I want to show the date and time for each task in the Entry table only of one particular project. For all other tables in that project, I want to use the default date format specified in the Project Options dialog. To specify the alternate date format for any table using Microsoft Project 2010 or 2013, complete the following steps:
1. Click the View tab to display the View ribbon.
2. In the Data section of the View ribbon, click the Tables pick list and select the More Tables item on the pick list.
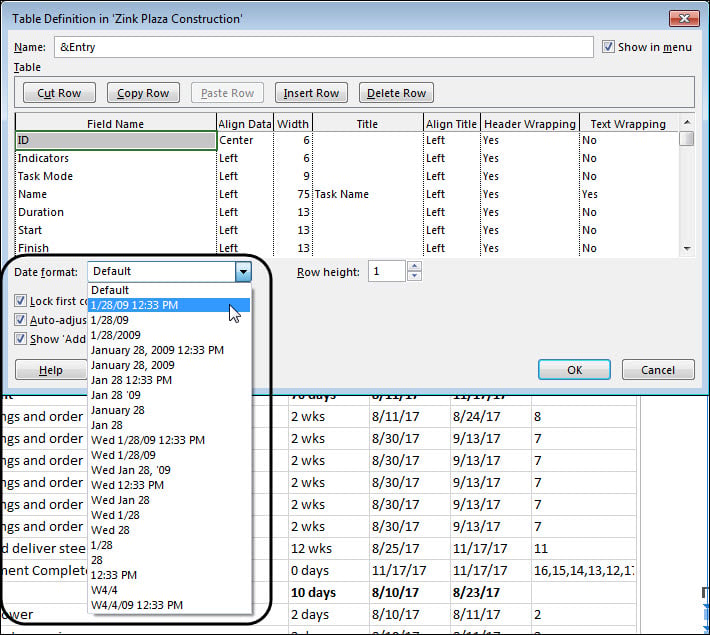
3. In the More Tables dialog, select the table whose date format you want to change, and then click the Edit button. For example, I selected the Entry table.
4. In the Table Definition dialog for the selected table, click the Date format pick list and select the alternate date format for the table. Notice in the following figure that I am selecting the 1/28/09 12:33 PM date format for the Entry table in my project.
5. In the Table Definition dialog, click the OK button to apply the custom date formatting to the selected table.
6. In the More Tables dialog, select the table in which you applied the custom date formatting, and then click the Apply button.
Notice in the following figure that Microsoft Project applied the custom date formatting to the Entry table so that I can see both the date and time for each task in the Start and Finish columns.
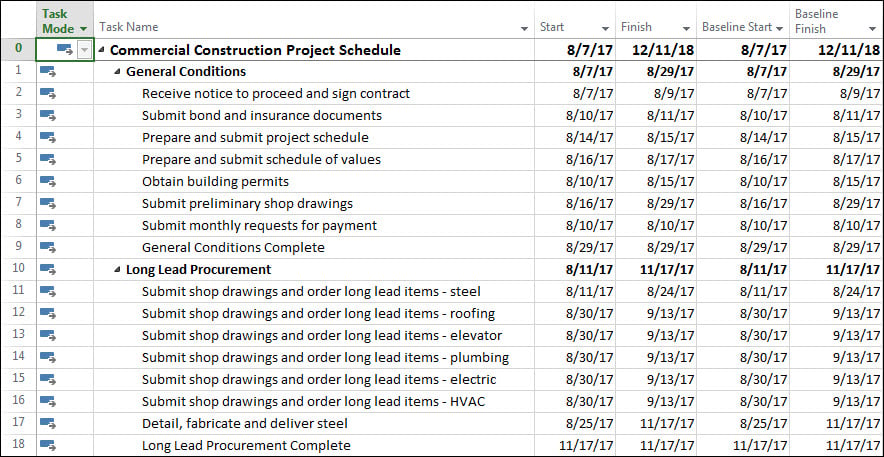
Keep in mind that when you apply custom date formatting to any table, Microsoft Project continues to apply to all other tables the date formatting specified in the Project Options dialog. For example, when I display the Variance table in this project, you can see that Microsoft Project continues to apply the 1/28/09 date formatting to all of the date-related columns in this table.
By the way, when I revealed this knowledge to my student, his jaw dropped and said, “Well, by golly!”
Did this blog post help you? Would you like to learn more about how to effectively use Microsoft Project, Microsoft Project Server, or Project Online to manage your projects? If so, please consider enrolling in one of our upcoming open enrollment training classes.
You can take our training classes “in person” in our EPMA training center in Houston, Texas or “live-virtual” over the Internet. And don’t forget to follow us on Twitter, LinkedIn, and Facebook.
For more details & kick start your project management journey, sign up for our Microsoft Training Classes or send us an email.
I hope you find this blog post helpful. For more tips and tricks on Project Management, please visit www.epmainc.com
GAIN VISIBILITY WITH PPMVUE
Bring your Project Online data to life with PPMVUE.
Create dashboards and reports for Portfolios, Projects and more in few clicks. Ready to use out of the box and works with any configuration
Download From Office Store Learn More