
Creating a Budget Cost, Budget Work, or Budget Material Resource
Many users are probably aware that it is possible to create a Budget Cost resource in Microsoft Project 2010 or 2013, which allows you to specify an overall cost budget for your entire project. However, I suspect that most users do not know that it is also possible to create a Budget Work resource to specify an overall work budget for a project, and to create a Budget Material resource to track an overall budget of usage for a consumable resource. On a construction project, for example, you might want to create a Budget Material resource to specify your anticipated budget for the usage of a particular construction material such as concrete.
Creating a Budget Cost Resource
To create a Budget Cost resource, complete the following steps in Microsoft Project 2010 or 2013:
1. Open a project and apply the Resource Sheet view.
2. In the first blank row of the Resource Sheet view, manually type the name of the new Budget Cost resource.
3. In the Type column, select the Cost item.
4. Right-click on the newly-created Cost resource and select the Information item on the shortcut menu. Microsoft Project displays the Resource Information dialog for the selected resource, such as shown in Figure 1.
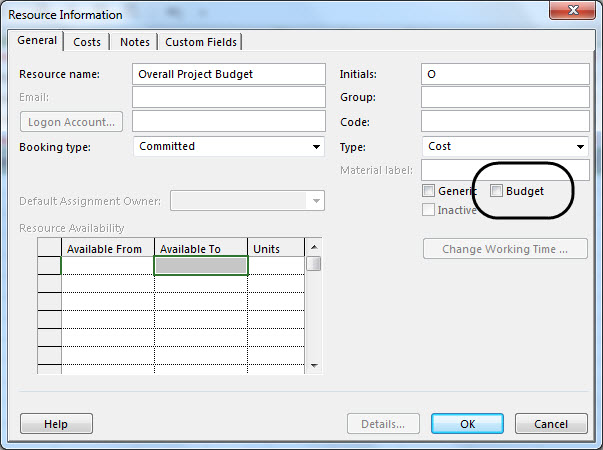
Figure 1: Resource Information dialog
5. On the right side of the Resource Information dialog for the new Cost resource, select the Budget checkbox indicated in Figure 1 shown previously.
6. Click the OK button.
7. Specify values for the new Budget Cost resource in the Initials, Group, and Accrue At columns, as needed.
Creating a Budget Work Resource
To create a Budget Work resource, complete the following steps in Microsoft Project 2010 or 2013:
1. Open a project and apply the Resource Sheet view.
2. In the first blank row of the Resource Sheet view, manually type the name of the new Budget Work resource.
3. In the Type column, leave the Work value selected.
4. Right-click on the newly-created Work resource and select the Information item on the shortcut menu. Microsoft Project displays the Resource Information dialog for the selected resource, such as shown previously in Figure 1.
5. On the right side of the Resource Information dialog for the new Work resource, select the Budget checkbox.
6. Click the OK button.
7. Specify values for the new Budget Work resource in the Initials, Group, Accrue At, and Base Calendar columns, as needed.
Creating a Budget Material Resource
To create a Budget Material resource, complete the following steps in Microsoft Project 2010 or 2013:
1. Open a project and apply the Resource Sheet view.
2. In the first blank row of the Resource Sheet view, manually type the name of the Budget Material resource.
3. In the Type column, select the Material item.
4. In the Material Label column, enter the term that describes how you track the usage of the Material resource. For example, for a Material resource named Concrete, you might enter Cubic Yards in the Material Label column.
5. Right-click on the newly-created Material resource and select the Information item on the shortcut menu. Microsoft Project displays the Resource Information dialog for the selected resource, such as shown previously in Figure 1.
6. On the right side of the Resource Information dialog for the new Material resource, select the Budget checkbox.
7. Click the OK button.
8. Specify values for the new Budget Cost resource in the Initials, Group, and Accrue At columns, as needed.
Figure 2 shows three new Budget resources that I created in a construction project. Notice that I created a Budget Cost resource named Overall Project Budget to track the monetary budget of the project, a Budget Work resource named Overall Work Budget to track the budget of work hours for the project, and a Budget Material resource named Overall Concrete Budget to track our anticipated usage of concrete for the entire project.
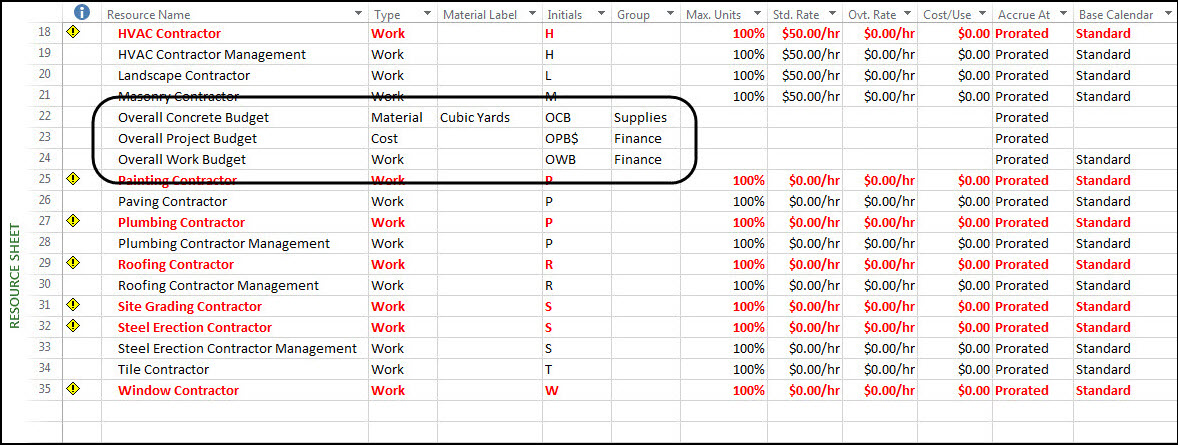
Figure 2: Budget Resources created
Assigning Budget Resources
After you create the Budget resources you need for your project, your next step is to assign these Budget resources to the project. As part of the design of Budget resources, Microsoft Project 2010 and 2013 only allow you to assign Budget resources to the Project Summary Task (aka Row 0 or Task 0). This is how you specify the overall budget of cost, work, and consumables for your entire project. Assigning Budget resources to your project is a two-step process. You must first set up the Task Usage view, and then you can assign the Budget resources.
Setting Up the Task Usage View
To set up the Task Usage view in your project, complete the following steps:
1. Apply the Task Usage view.
2. Right-click on the Work column header and select the Insert Column item on the shortcut menu.
3. In the list of available task columns, select the Budget Cost column (if you are using at least one Budget Cost resource in your project).
4. Right-click on the Work column header and select the Insert Column item on the shortcut menu.
5. In the list of available task columns, select the Budget Work column (if you are using Budget Work and/or Budget Material resources in your project).
6. On the right side of the Task Usage view, right-click anywhere in the timephased grid (timesheet) and select the Detail Styles item on the shortcut menu. Microsoft Project displays the Detail Styles dialog shown in Figure 3.
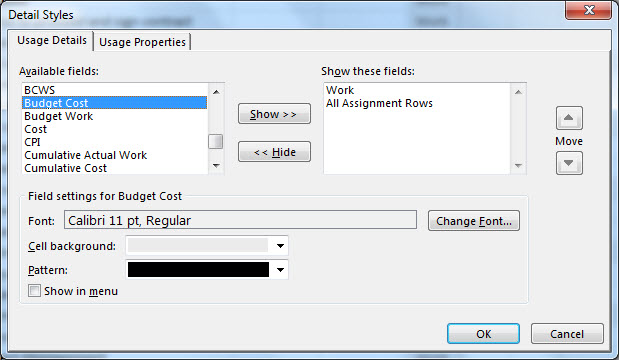
Figure 3: Detail Styles dialog
7. In the Available fields list on the left side of the Detail Styles dialog, select the Budget Cost field and then click the Show button (if you are using at least one Budget Cost resource in your project).
8. In the Available fields list on the left side of the Detail Styles dialog, select the Budget Work field and then click the Show button (if you are using Budget Work and/or Budget Material resources in your project).
9. In the Show these fields list on the right side of the Detail Styles dialog, optionally select the Work field and then click the Hide button to remove this row from the timephased grid.
Figure 4 shows the Detail Styles dialog after adding the Budget Cost and Budget Work fields, and then hiding the Work field.
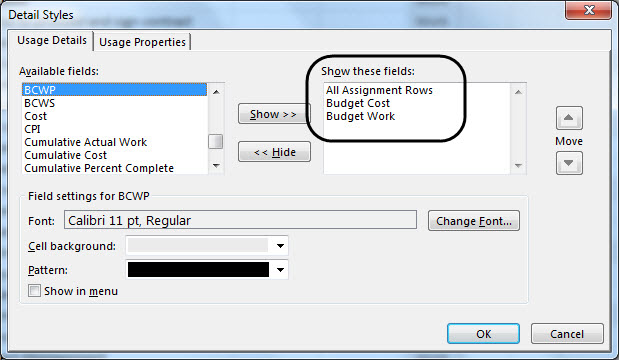
Figure 4: Detail Styles dialog with the Budget Cost and Budget Work fields added
10. Click the OK button.
11. In the timephased grid (timesheet) on the right side of the Task Usage view, widen the Details column so that you can see the full name of each row.
Assigning a Budget Resource
To assign a Budget resource to the Project Summary Task, complete the following steps:
1. Select the Project Summary Task (aka Row 0 or Task 0).
Note: If you do not see the Project Summary task in your project, click the Format tab to display the Format ribbon and then select the Project Summary Task checkbox in the Show/Hide section of the ribbon.
2. Click the Resource tab to display the Resource ribbon.
3. In the Assignments section of the Resource ribbon, click the Assign Resources button. Microsoft Project displays the Assign Resources dialog shown in Figure 5.
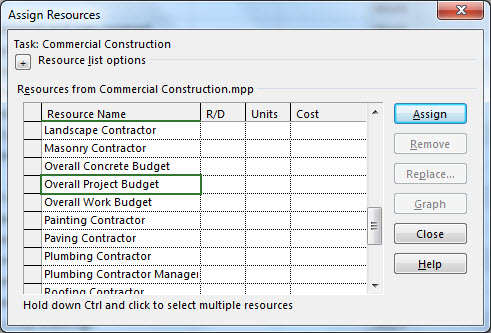
Figure 5: Assign Resources dialog
4. In the Assign Resources dialog, select a Budget resource that you want to assign and then click the Assign button.
5. Repeat the preceding step for each Budget resource you want to assign to the project.
6. Click the Close button to close the Assign Resources dialog.
Microsoft Project displays the Budget resources assigned to the Project Summary Task, such as the three Budget resources shown in Figure 6.
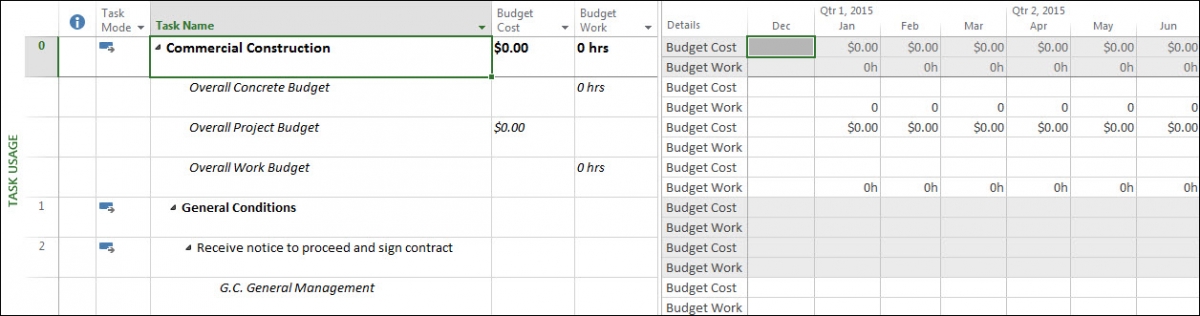
Figure 6: Budget resources assigned to a project
7. For any Budget Cost resource assigned to the Project Summary task, enter your overall monetary budget for the project in the Budget Cost column.
8. For any Budget Work resource assigned to the Project Summary task, enter your budget of work hours for the project in the Budget Work column.
9. For any Budget Material resource assigned to the Project Summary task, enter your anticipated usage of the consumable resource for the project in the Budget Work column.
Figure 7 shows the construction project after assigning all three types of Budget resources to the Project Summary task. Notice that I entered $325,000 as the overall monetary budget for the project, 8,200 hours as the overall budget of work hours for the project, and 160,000 cubic yards as the anticipated usage of concrete for the project.
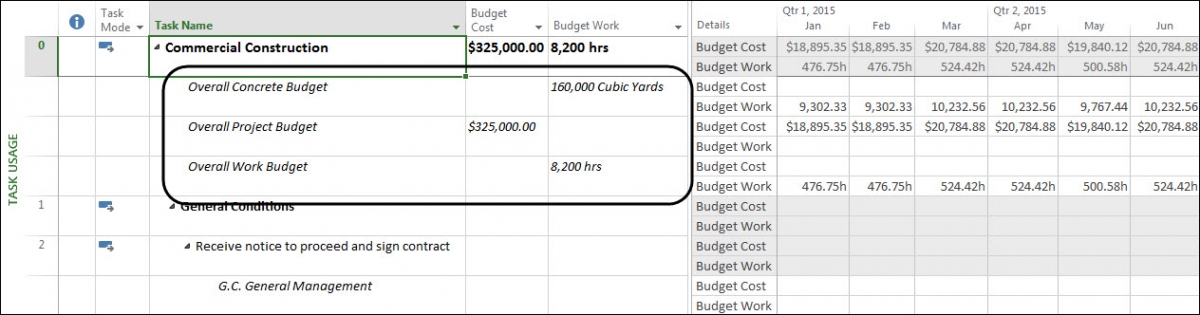
Figure 7: Budget Cost and Budget Work values entered for the Budget resources
Note: For even more information about using Microsoft Project, be sure to download a set of our Microsoft Project 2013 reference cards by clicking Download Now.
Interested in how EPMA can help your schedules? Contact us today at 1.888.444.EPMA or enroll for one of our training classes.

Please feel free to leave comments below or check out our other blogs on Microsoft Project, Project Server, SharePoint and Project Management Methodology.
GAIN VISIBILITY WITH PPMVUE
Bring your Project Online data to life with PPMVUE.
Create dashboards and reports for Portfolios, Projects and more in few clicks. Ready to use out of the box and works with any configuration
Download From Office Store Learn More