
Microsoft Project gives you the choice between Manually Scheduling your projects or using Microsoft’s Auto Scheduling engine. The question is, which method do you prefer?
The major difference between Manually Scheduled and Auto Scheduled Tasks is that the Manually Scheduled feature enables user controlled scheduling and gives the user responsibility to track schedules on any particular task. Manually Scheduled turns off the scheduling engine for all new tasks created. This feature enables users to have the option to enter tasks without restrictions as opposed to Auto Scheduled which allows MS Project to update dates and durations for each tasks created automatically.
Anyone using MS Project has the choice to switch between these two options, they both have their disadvantages as well as advantages but that depends solely on the scope of your project as well as your reasons behind using MS Project.
In my humble opinion, I recommend Auto Scheduled. It is great when updating a schedule because the scheduling engine keeps track of all dependencies, resources and assignments making sure that the schedule is up to date and ready to go.
Fresh out of the box, Manually Scheduled is the default setting. You will have to change this feature to properly enjoy this lovely tool.
To change this, Click File, In the Options pane, clicking on the Schedule button, towards the bottom, the scheduling options for this project > New Tasks Created will provide the selection between Auto Scheduled and Manually Scheduled. Selecting Auto Scheduled and OK changes the default for all new tasks to be created. (Screenshots Below)
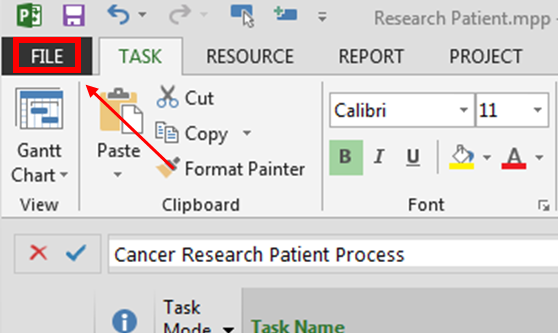
First click File.
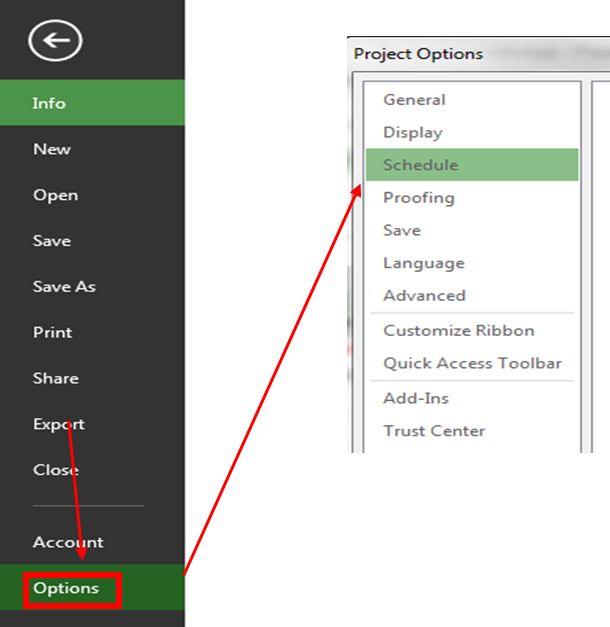
Select the Options button and click on the Schedule button to view the options provided.
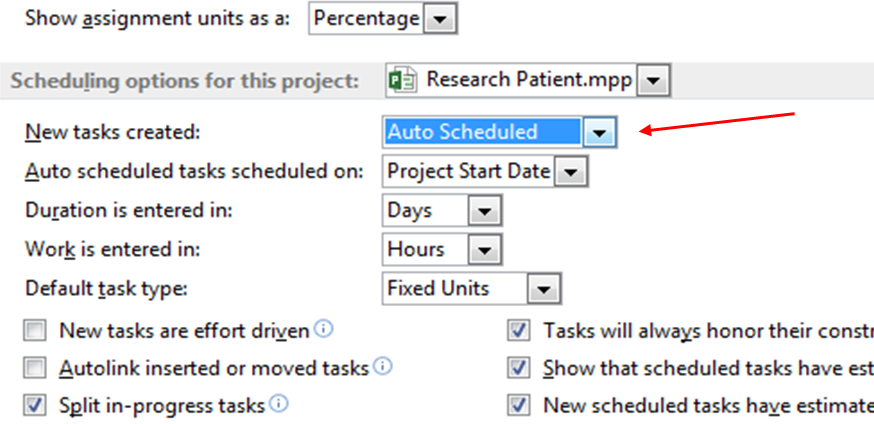
Among the options, under the section scheduling options for this project clicking on the drop down list for New Tasks Created will provide the selection between Auto Scheduled and Manually Scheduled.
Side Note:
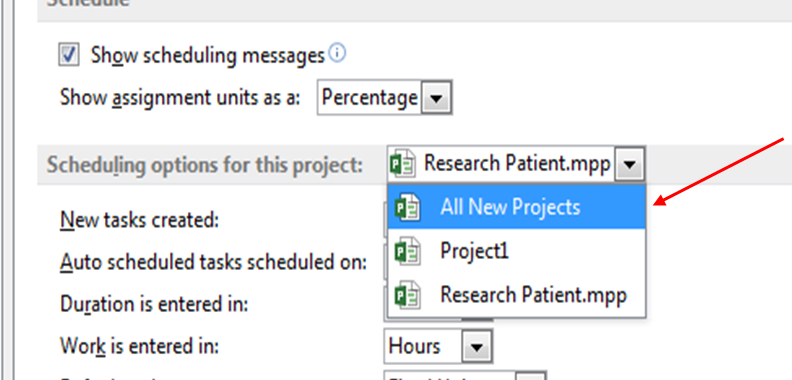
In order to set this change permanently, making all new Projects automatically scheduled. In the Options pane,click on the Schedule button (towards the bottom). The scheduling options for this project will provide a drop down list, selecting All New Projects (as pictured below) saves this setting for future projects.
[Stay tuned for more… I’ll be going over this in detail in a future post.]
Another way to change how new Tasks would be scheduled is to change it in the status bar (found in the left corner of the application’s window)
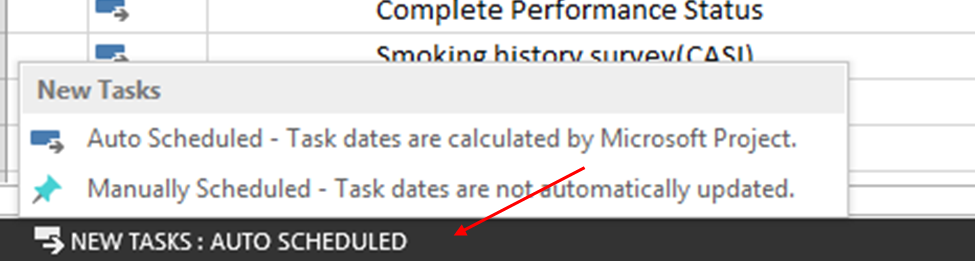
Making changes here also ensures that new tasks will be entered with whichever selections you have made.
Be sure to check these out and make your changes accordingly and also be on the lookout for part two where I’ll be talking about different ways to switch between Manually Scheduled and Auto Scheduled for existing tasks.
Stay tuned for Part Two, but in the meantime visit our website to download some quick reference cards.
Interested in how EPMA can help your schedules? Contact us today at 1.888.444.EPMA or enroll for one of our training classes.

Please feel free to leave comments below or check out our other blogs on Microsoft Project, Project Server, SharePoint and Project Management Methodology.
GAIN VISIBILITY WITH PPMVUE
Bring your Project Online data to life with PPMVUE.
Create dashboards and reports for Portfolios, Projects and more in few clicks. Ready to use out of the box and works with any configuration
Download From Office Store Learn More