
In Microsoft Project Server, we have had the ability to link project-related artifacts such as documents, issues, and risks to project tasks and to one another for quite some time. What if we want to add more types of artifacts to our Project Sites, such as team contacts, change requests, action items, and link them as well? In Microsoft Project Server 2013, you can enable this additional linking with the right level of administrative privilege… without custom development. This two-step process consists of:
- Un-hide the ‘Related Items’ Site Column in the PWA web site (which is the parent to all Project Sites), thus making the Site Column visible and available for use in the Project Sites.
- Visit the desired artifact repository (list or library) in a Project Site and add the ‘Related Items’ Site Column to the repository.
Note: You can perform step 2 above in an individual Project Site or in a Project Site template for use in future Project Sites created from that template.
Un-hiding the ‘Related Items’ Site Column:
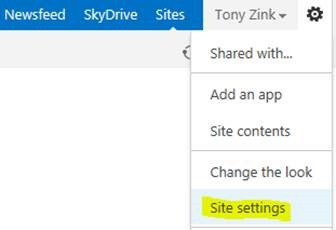
Visit your PWA web site, open the settings menu, and navigate to ‘Site settings’:
On the ‘Site Settings’ page, navigate to ‘Site content types’:

On the ‘Site Content Types’ page, find the ‘Task’ Site Content Type in the list and click its name:
.jpg)
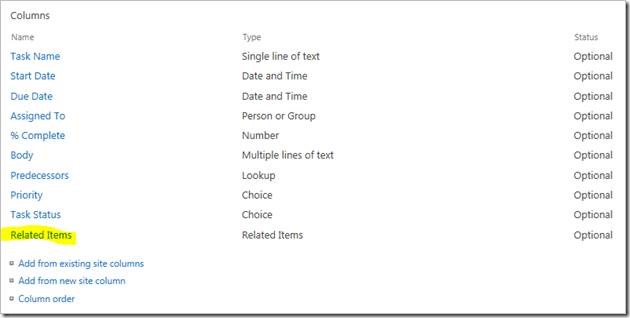
On the Task Site Content Type page, scroll to the ‘Columns’ section, find the ‘Related Items’ column, and click its name:
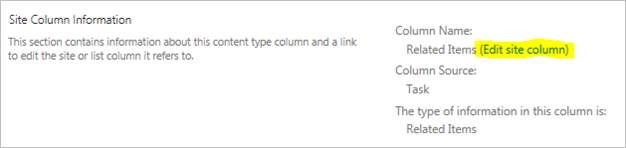
On the ‘Change Content Type Column’ page, locate the ‘Edit site column’ link next to the ‘Related Items’ column name and click the link:
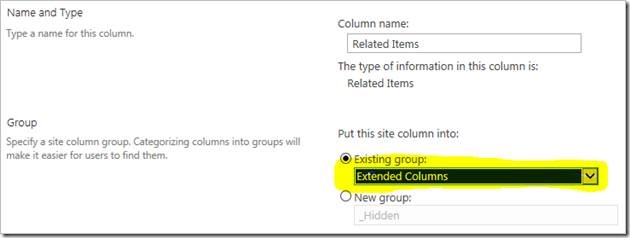
On the ‘Edit Column’ page, select a different group from the ‘Existing group’ pick list such as ‘Extended Columns’ (thus removing it from the ‘_Hidden’ group), then click the ‘OK’ button:
Adding the ‘Related Items’ Site Column to a List or Library:
Now that the ‘Related Items’ Site Column is visible and available for general use, visit the desired list or library in a Project Site and navigate to the ‘List Settings’ or ‘Library Settings’ page:

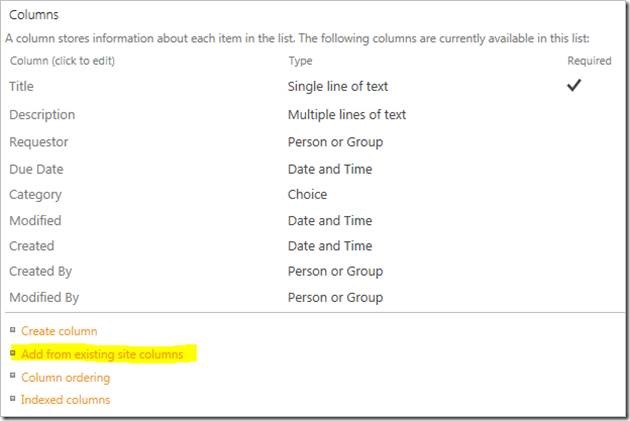
On the list or library settings page, scroll to the ‘Columns’ section and click the ‘Add from existing site columns’ link:
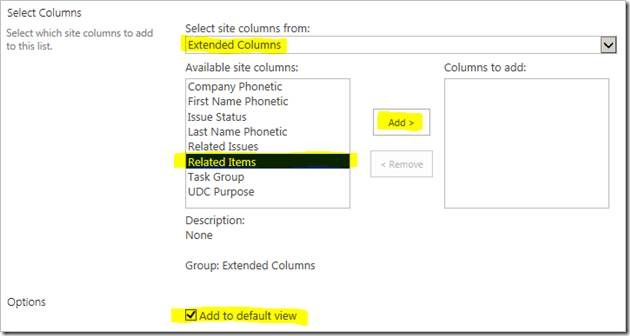
On the ‘Add Columns from Site Columns’ page, locate the ‘Related Items’ column in the left ‘Available site columns’ list (selecting the appropriate parent group from the ‘Select site columns from’ list helps) and click the ‘Add’ button; you may also wish to add the column to the default list or library view:
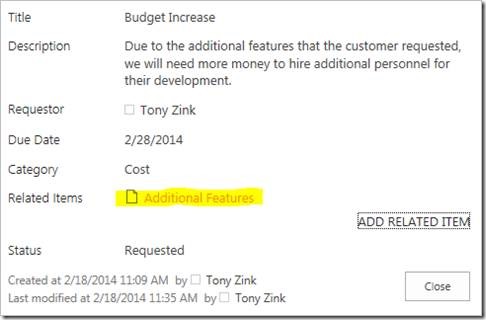
When you return to the list or library and view an item’s properties, the ‘ADD RELATED ITEM’ option now appears:

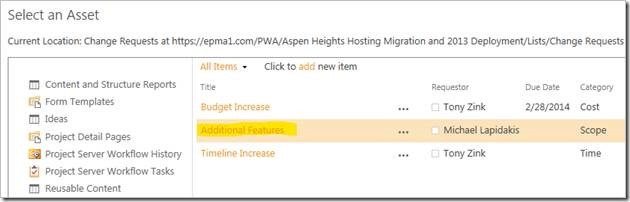
Clicking the ‘ADD RELATED ITEM’ link displays the ‘Select an Asset’ dialog, allowing you to select an item from any list or library in the site:
The selected item is then linked and displayed (with a hyperlink) with the previously selected item:
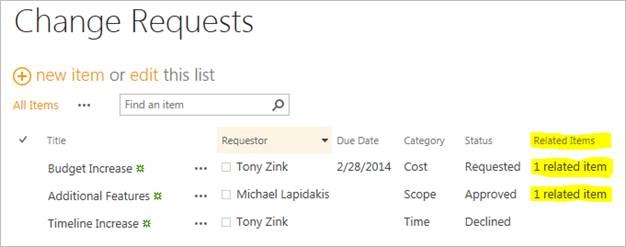
If you chose to add the newly-added ‘Related Items’ column to the default view in the list or library, then the system displays notifications next to linked items in the view:
Good luck!
GAIN VISIBILITY WITH PPMVUE
Bring your Project Online data to life with PPMVUE.
Create dashboards and reports for Portfolios, Projects and more in few clicks. Ready to use out of the box and works with any configuration
Download From Office Store Learn More