
I know there are project managers out there managing their schedule using Project 2013 with Project Server when the need arises to replace a resource for a myriad of reasons. The instructions below will give you the steps you will need to replace the existing resource with a new resource. By using this method the Actual Work already completed by the original resource will be unaffected and the remaining work will be assigned to the new resource.
Step 1: Open the project in Project Professional
Step 2: Navigate to the Resource tab in the ribbon
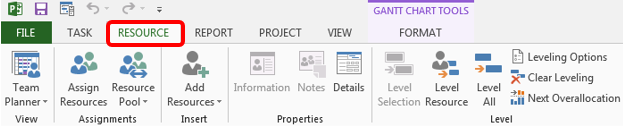
Step 3: Select the task(s) assigned to the resource that you want to replace

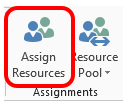
Step 4: In the Assignments section of the Resource Tab in the ribbon, select Assign Resources to Activate the Assign Resource Dialog box
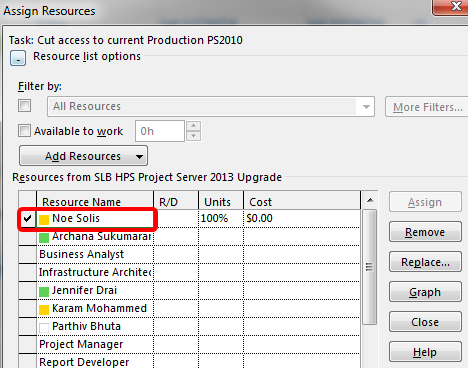
Step 5: Select the Name of the currently assigned resource. Selecting the name of the person you want to replace activates the Replace button which was previously greyed out
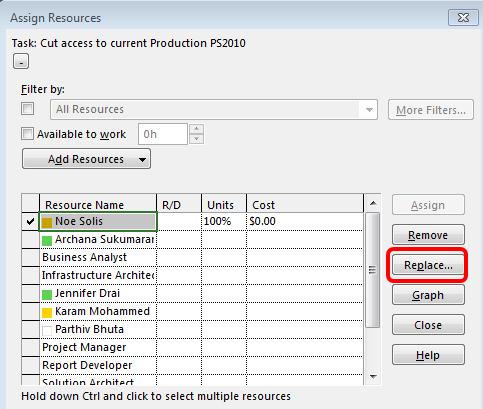
Step 6: Select Replace button to activate the Replace Resource dialog box
Step 7: Select the name of the New Resource you want to assign to the task(s)
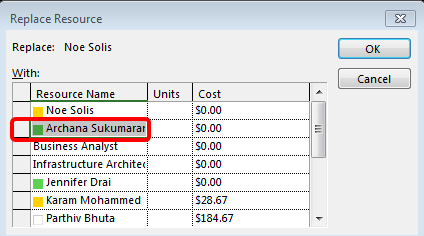
Step 8: Close the Assign Resources dialog box using the Close Button to complete the reassignment
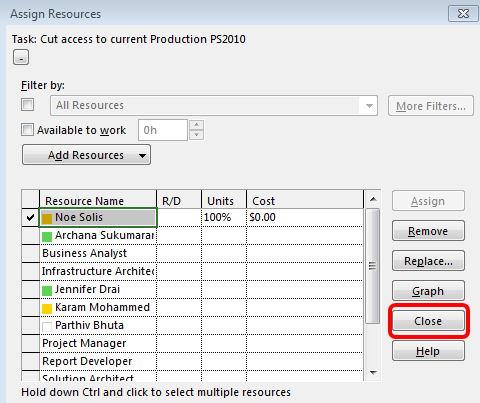
Note: Noe has been replace with Archana

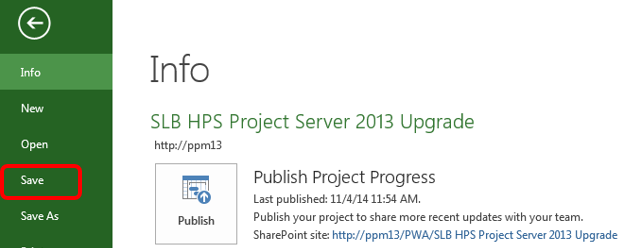
Step 9: Save your project using File/Save
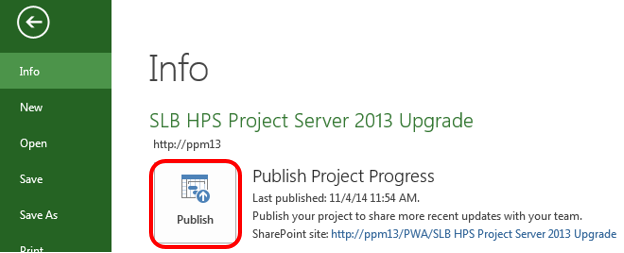
Step 10: The Final step is to Publish your project so the new assignments will populate the resource’s timesheets in Project Web Access (PWA)
That’s all it takes.
Interested in how EPMA can help your schedules? Contact us today at 1.888.444.EPMA or enroll for one of our training classes http://www.epmainc.com/epma-institute/course-listing

Please feel free to leave comments below or check out our other blogs on Microsoft Project, Project Server, SharePoint and Project Management Methodology.