
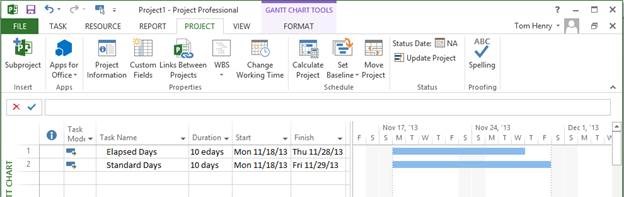
Here is a quick blog to introduce Microsoft Project users to a quick and easy tip when dealing with task durations and elapsed days. In Microsoft Project it is possible to model duration in terms of ‘elapsed’ days. Elapsed days are used when a task’s duration needs to disregard any ‘nonworking time’ or resource constraints. For example if you need a task to be scheduled over 10 consecutive days including weekends and ignoring resource availability you could set the duration to ‘10 edays’
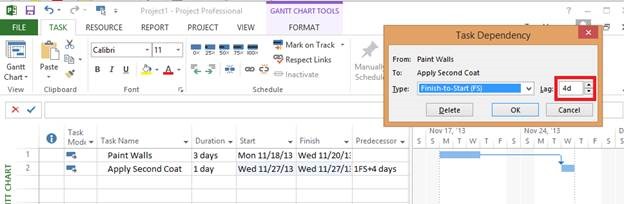
An example where this feature is particularly useful is when you are modeling delays or ‘Lags’ in Microsoft Project. A ‘lag’ is used to model an external delay. For example: ‘Waiting for a package to be delivered’ or ‘Waiting for paint to dry’. Neither of these activities require any ‘work effort’ but they do affect the duration of the project. So if you are waiting for a task such as ‘Paint to Dry’ before you can ‘Apply Second Coat’ you can make use of the edays to model this delay or ‘Lag’ as the paint can dry regardless of whether it is the weekend or if it falls on a holiday. As you can see below there is a task ‘Paint walls’. Once that task is finished you need to wait 4 elapsed days before the next task may begin. In order to achieve this lag with a duration of 4ed was added to the link between the two tasks. On the Gantt chart you can see that the paint takes exactly 4 days to dry which includes the weekend.
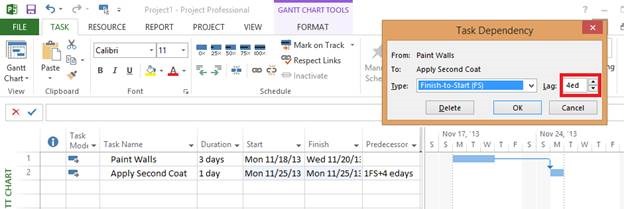
If this lag was modeled to have a normal 4 day lag there would be a 6 ‘elapsed day’ lag as Microsoft Project assumes that the paint won’t dry over the weekend.
I hope you find this blog post helpful. For more tips and tricks on Project Management, please visit www.epmainc.com
GAIN VISIBILITY WITH PPMVUE
Bring your Project Online data to life with PPMVUE.
Create dashboards and reports for Portfolios, Projects and more in few clicks. Ready to use out of the box and works with any configuration
Download From Office Store Learn More