
Background
A common request in the Microsoft Project user forum is to format the colors of Gantt bars automatically based on who is assigned to each task. For example, I want the Gantt bars for tasks assigned to the project manager to be formatted with the green color, while I want the Gantt bars for tasks assigned to the electrical engineer to be formatted with the purple color. Although automatic formatting of Gantt bar colors based on the resource assigned is not possible in any version of Microsoft Project, there is a work around: use custom Flag fields to automatically format Gantt bar colors. In this blog post, I use the example of how to set up automatic Gantt bar formatting based on the resource assigned to each task, but you can extend the knowledge for your own purposes.
Setting Up Custom Flag Fields
Before you can begin the automatic formatting process, you need to set up the custom task Flag fields for this process by completing the following steps:
1. Click the Project tab to display the Project ribbon.
2. In the Properties section of the Project ribbon, click the Custom Fields button.
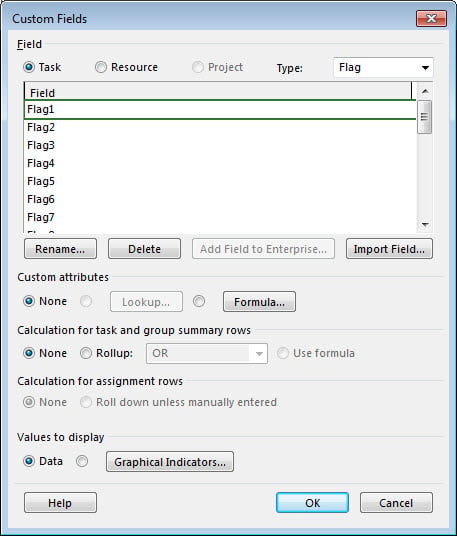
3. In the Custom Fields dialog, click the Type pick list and select the Flag item, as shown in the following figure.
4. In the list of custom Flag fields, select an available field and then click the Rename button. Microsoft Project displays the Rename Field dialog shown in the following figure.
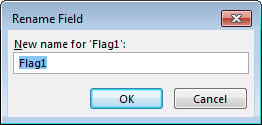
5. In the Rename Field dialog, enter a new name for the selected Flag field and then click the OK button.
6. Repeat steps #4-5 for each Flag field you want to use for the automatic formatting of Gantt bar colors.
Microsoft Project shows the new names for the customized Flag fields in the Custom Fields dialog, such as shown in the following figure. Notice that I used the first seven Flag fields to identify different types of construction contractors.
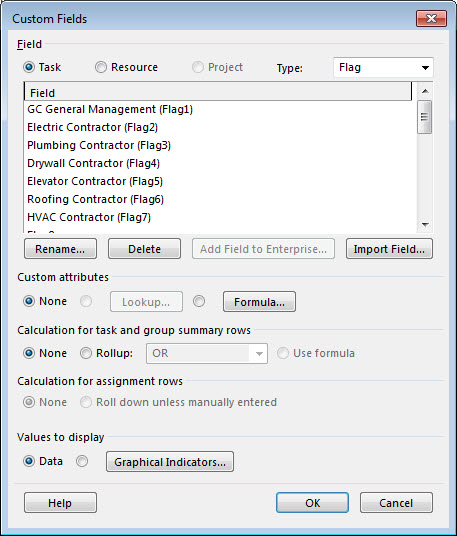
7. Click the OK button.
Displaying the Custom Flag Fields
After setting up the Flag fields you want to use for the automatic formatting of the Gantt bars, you must now display the customized Flag fields in the Gantt Chart view by completing the following steps:
1. Apply the Gantt Chart view.
2. Right-click on the Duration column header and select the Insert Column item on the shortcut menu.
3. In the list of available task fields, select one of your customized Flag fields.
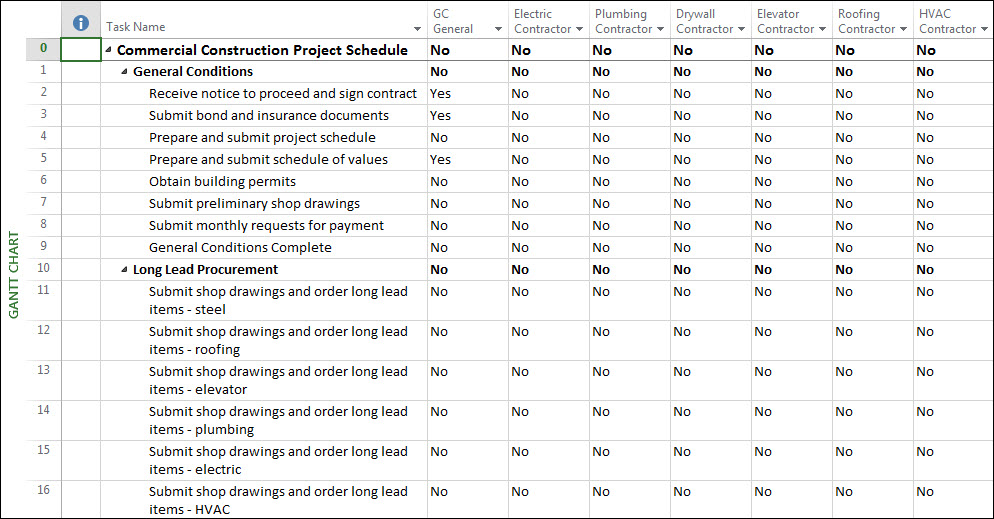
4. Repeat steps #2-3 to insert each of the customized Flag fields. The following figure shows the seven customized Flag fields inserted into the Gantt Chart view.
Setting Yes Values in the Flag Fields
After inserting the Flag fields into the Gantt Chart view, your next step is to specify a Yes value in one of these Flag fields for each task of interest. If you want to tie the automatic formatting of Gantt bar colors to the resource assigned to the task, there is a nice trick to locate the tasks assigned to a specific resource to speed up the process. To use this trick, complete the following steps:
1. Click the View tab to display the View ribbon.
2. In the Data section of the View ribbon, click the Filter pick list and select the Using Resource… filter on the menu.
3. In the Using Resource dialog, click the Show tasks using pick list and select the name of a resource, such as shown in the following figure.
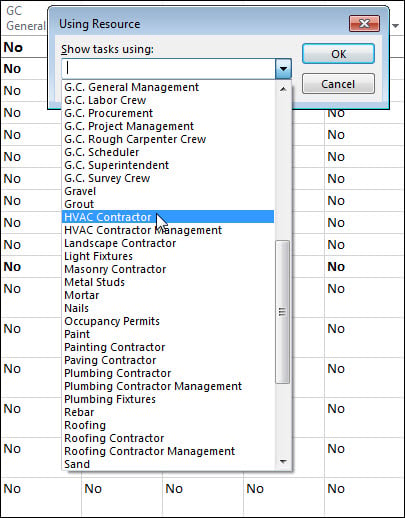
4. Click the OK button. Microsoft Project displays only those tasks assigned to the selected resource, along with their summary tasks.
5. Specify a Yes value in one customized Flag field for every task assigned to the selected resource. For example, in my sample project, I will specify a Yes value in the HVAC Contractor column for every task assigned to the HVAC Contractor resource.
6. Repeat steps #2-5 for the resources whose tasks you want to automatically format.
Warning: You should not specify a Yes value in more than one Flag field for any task. If you have a Yes value in multiple Flag fields for the same task, keep in mind that Microsoft Project can only specify one color for the task, and will apply the color for the bar style listed last in the Bar Styles dialog. I discuss how to set up the Bar Styles dialog in the next topical section of this blog post.
7. Press the F3 function key to remove the Using Resource… filter.
8. Select the column headers for all of the custom Flag fields, right-click anywhere in the selected column headers, and then select the Hide Column item on the shortcut menu.
Specifying the Flag Fields Used in the Bar Styles Dialog
After setting up the custom Flag fields and specifying a value in one Flag field per task, you are ready to set up the automatic formatting of Gantt bars colors based on the Flag field that contains the Yes value. To do this, complete the following steps:
1. Double-click anywhere in the white part of the Gantt Chart panel. Microsoft Project displays the Bar Styles dialog shown in the following image.
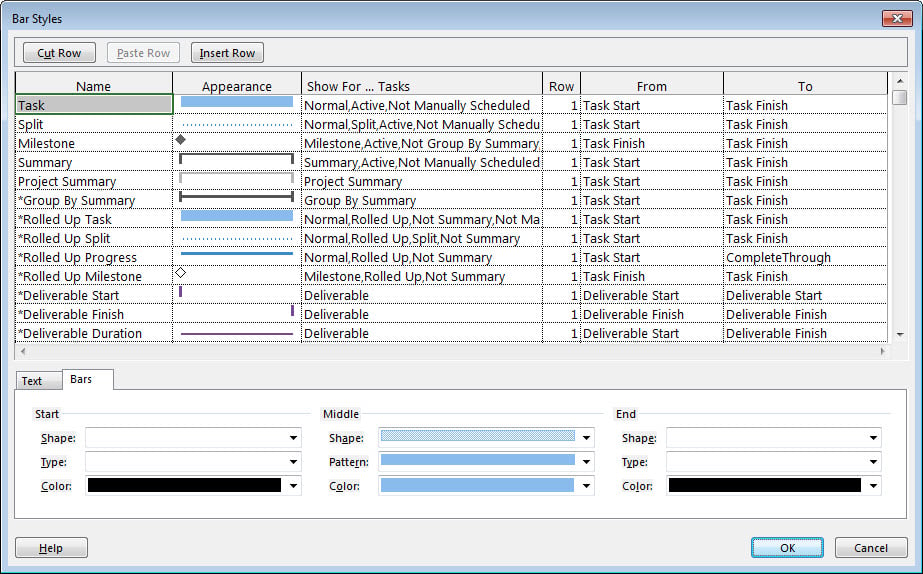
2. Scroll to the bottom of the list of bar styles shown in the Bar Styles dialog and select the first blank row.
3. In the Name column, enter a descriptive name based on each of the custom Flag fields you created. Using my resource name example, I might enter a bar style named Drywall Contractor Task.
4. Press the Right-Arrow key on your computer keyboard to navigate to the Appearance column.
5. In the Bars section at the bottom of the dialog, click the Color pick list in the Middle section and select the color to use for the Gantt bars of this type.
6. Select the blank cell in the Show For…Tasks column, click the pick list arrow button in the blank cell, and select the Flag field used for this type of tasks. For example, I would enter the Flag4 field used to identify tasks assigned to the Drywall Contractor.
7. Leave all other default information for the bar styles row.
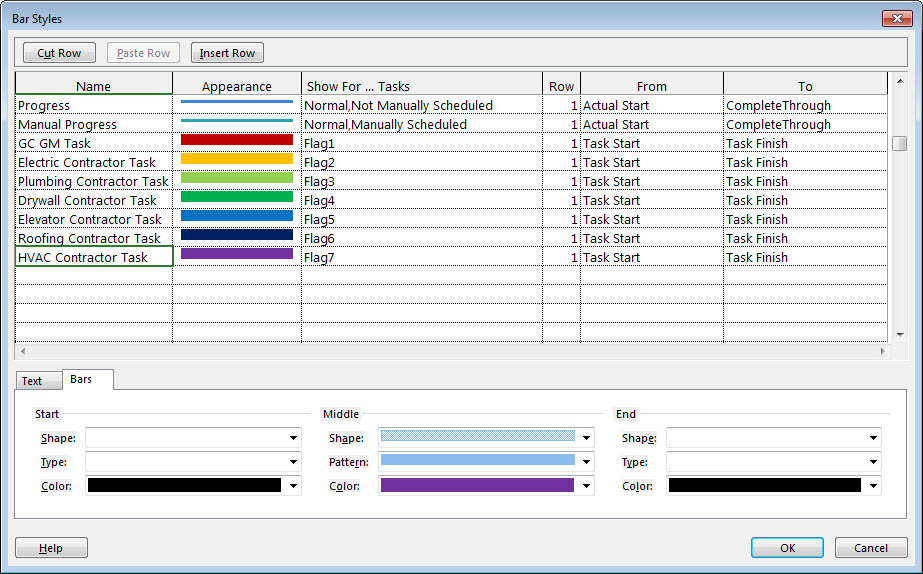
8. Repeat steps #2-7 for every bar style you need to create to automatically format Gantt bars in the Gantt Chart view. The following figure shows the Bar Styles dialog with seven new bar styles definitions, one for each resource whose Gantt bars I want to format automatically.
9. Click the OK button.
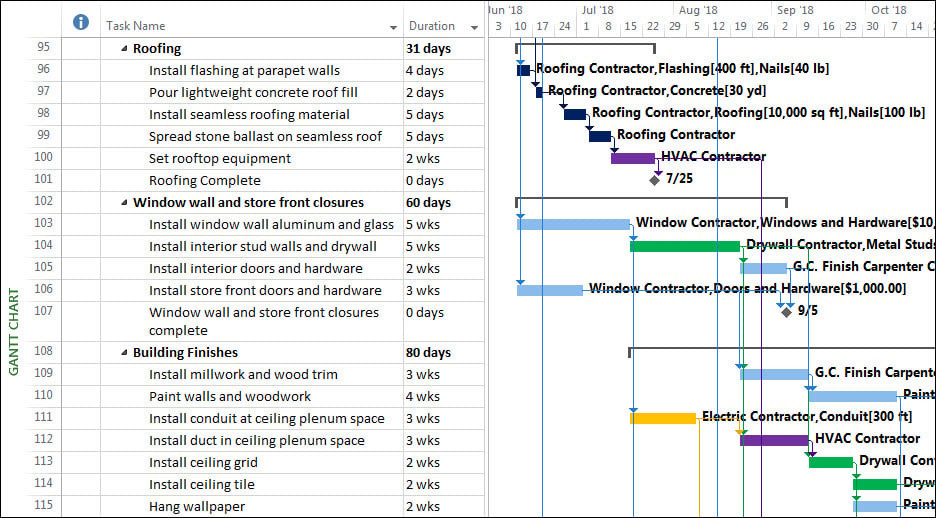
The following figure shows the Gantt Chart view after applying the seven new bar styles shown in the previous figure. Notice that the dark blue Gantt bars are for tasks assigned to the Roofing Contractor, the purple Gantt bars are for tasks assigned to the HVAC contractor, the green Gantt bars are for tasks assigned to the Drywall Contractor, and the yellow Gantt bar is for the task assigned to the Electric Contractor.
Did this blog post help you? Would you like to learn more about how to effectively use Microsoft Project, Microsoft Project Server, or Project Online to manage your projects? If so, please consider enrolling in one of our upcoming open enrollment training classes.
You can take our training classes “in person” in our EPMA training center in Houston, Texas or “live-virtual” over the Internet. And don’t forget to follow us on Twitter, LinkedIn, and Facebook.
GAIN VISIBILITY WITH PPMVUE
Bring your Project Online data to life with PPMVUE.
Create dashboards and reports for Portfolios, Projects and more in few clicks. Ready to use out of the box and works with any configuration
Download From Office Store Learn More