
I recently taught an open enrollment Microsoft Project 2013 Advanced class to a wonderful group of students here at EPMA. During the class, I suddenly realized how many times I had asked my students to right-click on something in the software to access a shortcut menu. Often times, the fastest way to perform a procedure is to right-click and select an item on a shortcut menu. Allow me to share with you a few of my favorite right-clicking tricks for Microsoft Project 2010 and 2013:
1. Right-click on the Select All button. Microsoft Project displays a shortcut menu containing a list of commonly used tables. For example, Figure 1 shows that I am ready to select the Cost item on the shortcut menu to apply the task Cost table.
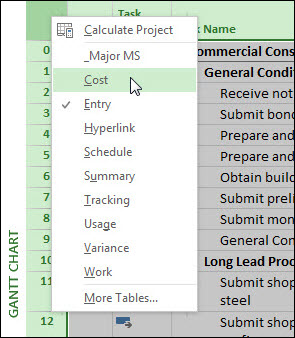
Figure 1: Right-click on the Select All button
2. Right-click on any Ribbon tab. Microsoft Project displays a shortcut menu that offers you multiple options for working with both the Ribbon and the Quick Access Toolbar. For example, Figure 2 shows that I am ready to click the Customize the Ribbon item on the shortcut menu so that I can customize the Ribbon.
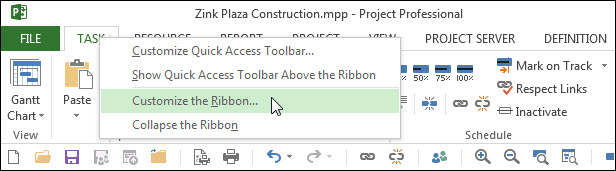
Figure 2: Right-click on a Ribbon tab
3. Right-click anywhere in the white part of the Gantt Chart pane. Microsoft Project displays a shortcut menu with several formatting options, along with two options at the bottom of the menu to display a split screen view. For example, Figure 3 shows that I am ready to select the Show Split item on the shortcut menu so that I can display the Task Entry view (a split view with the Gantt Chart view in the top pane and the Task Entry view in the bottom pane). Notice that you can also select the Show Timeline item to display the Gantt with Timeline view as well.
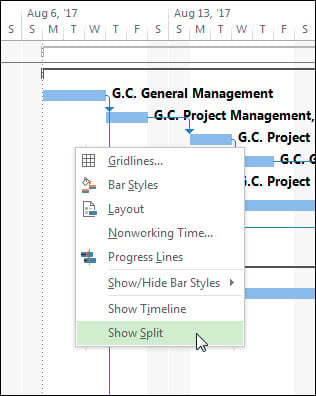
Figure 3: Right-click in the white part of the Gantt Chart pane
4. After applying the Task Entry view, you can right-click in the Task Form view to change set of details (fields and columns) displayed in the view. Microsoft Project displays a shortcut men with eight sets of details which you can apply to the Task Form. For example, Figure 4 shows that I am ready to select the Schedule item on the shortcut menu so that I can display the Schedule set of details in the Task Form.
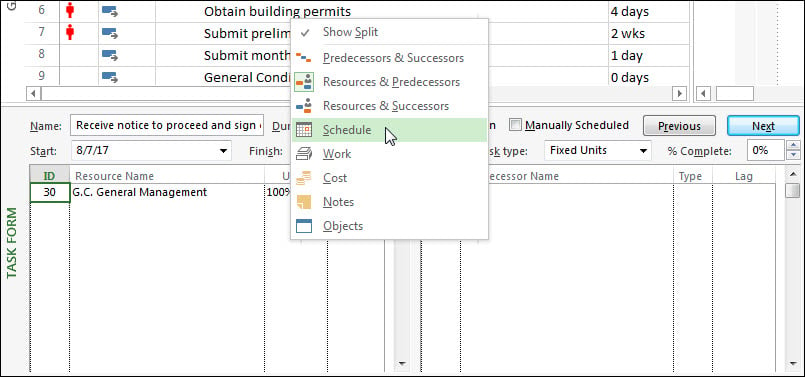
Figure 4: Right-click in the Task Form view
5. After applying a split view, you might want to change the view displayed in either the top pane or the bottom pane. To do this, right-click in the View Bar area on the far left side of the view. For example, Figure 5 shows that I am ready to select the Task Usage item on the shortcut menu to display the Task Usage view instead of the Task Form view in the bottom pane.
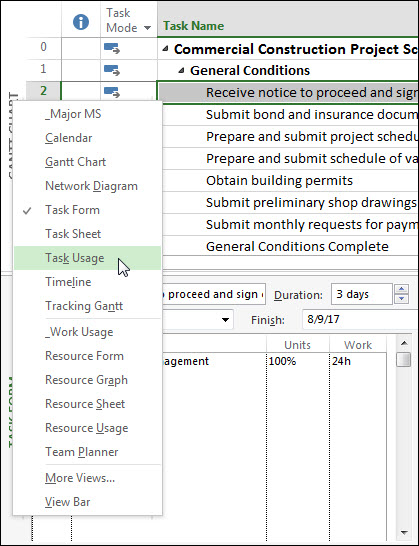
Figure 5: Right-click in the View Bar
6. Right-click on a task that displays the “burning man” icon (red stick figure) in the Indicators column, indicating that you have one or more overallocated resources assigned to the task. At the top of the shortcut menu, Microsoft Project displays two items with bold formatting that represent two possible solutions you can use to resolve the overallocation. For example, Figure 6 shows that I am ready to select the Schedule to Available Date item on the shortcut menu to delay the task as a method of resolving the resource overallocation.
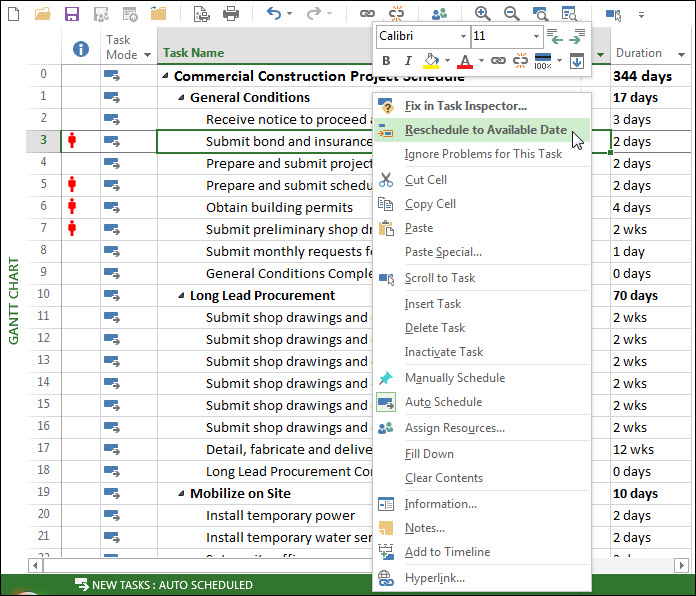
Figure 6: Right-click on a task with an overallocated resource assigned
7. Right-click on a selected block of tasks. Microsoft Project displays a shortcut menu with multiple options for working with all of the selected tasks, such as deleting the selected tasks, inserting new tasks, or setting the selected tasks to Inactive status. For example, Figure 7 shows that I am ready to select the Information item on the shortcut menu to display the Multiple Task Information dialog.
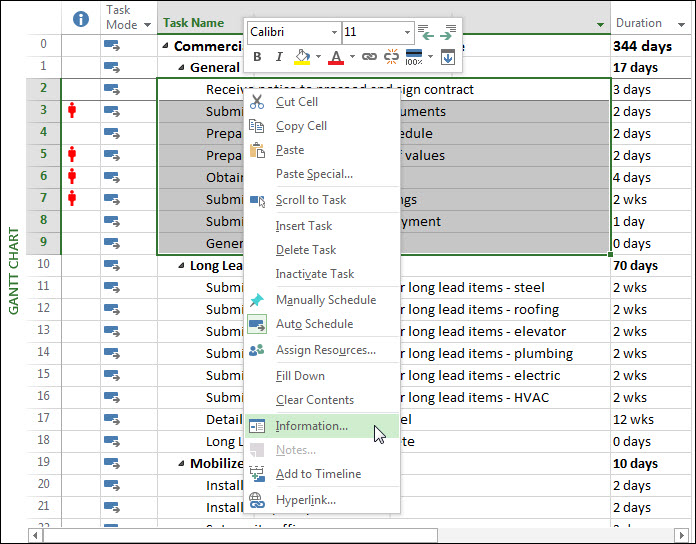
Figure 7: Right-click on a selected block of tasks
Interested in how EPMA can help your schedules? Contact us today at 1.888.444.EPMA or enroll for one of our training classes.
Please feel free to leave comments below or check out our other blogs on Microsoft Project, Project Server, SharePoint and Project Management Methodology.

GAIN VISIBILITY WITH PPMVUE
Bring your Project Online data to life with PPMVUE.
Create dashboards and reports for Portfolios, Projects and more in few clicks. Ready to use out of the box and works with any configuration
Download From Office Store Learn More