Changing Existing Tasks
In the part one of this blog I explained the major difference between Manually Scheduled and Auto Scheduled tasks.
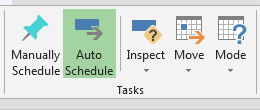
With tasks that have already been entered, it is still possible to switch over from Manually Scheduled to Auto Scheduled. One of the ways is by selecting the desired task and clicking on the Task Tab, under the Tasks section and then the Auto Scheduled button.
Another method would be by right clicking on any task and on the drop down list selecting the option to switch back and forth (as pictured below).
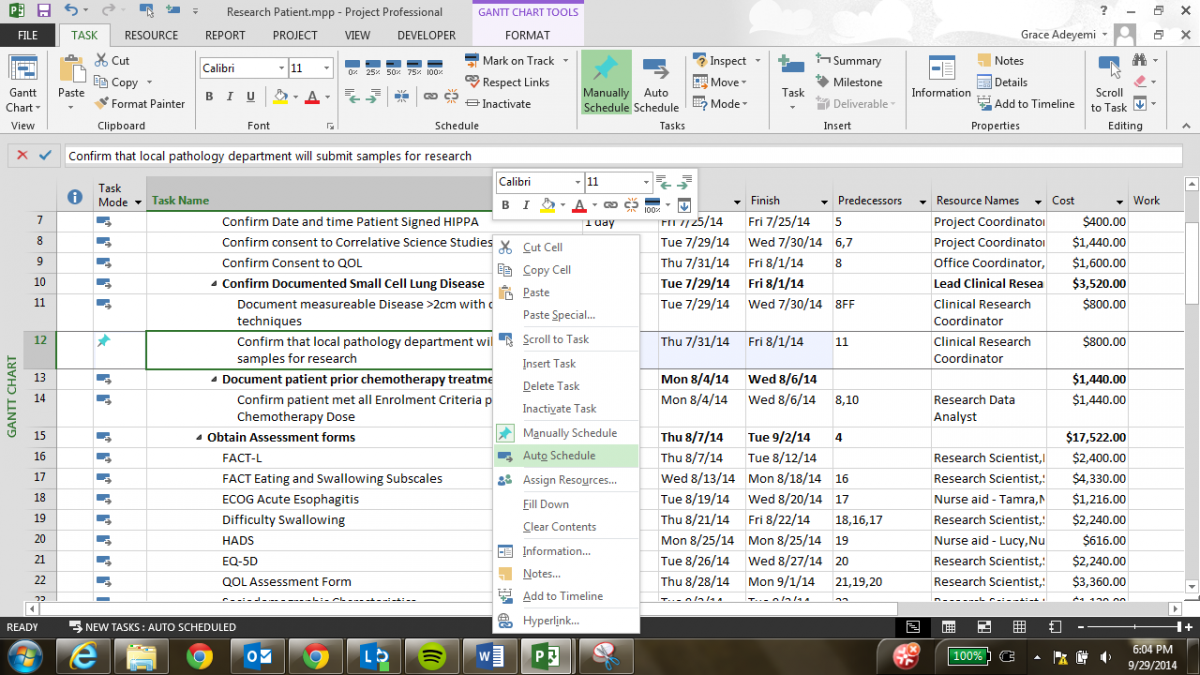
If the tasks were previously Manually Scheduled, the task will be changed to Auto Scheduled and MS Project will calculate the dates according to the entered values.

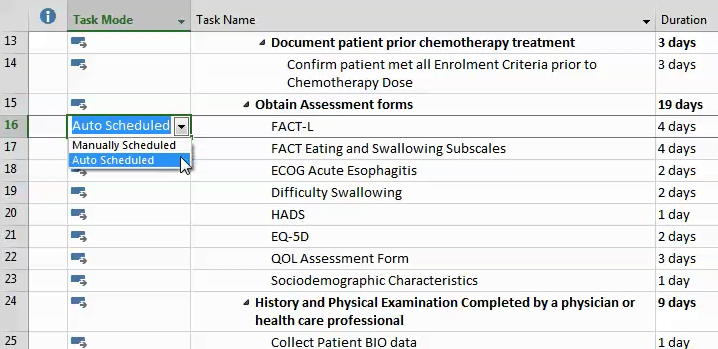
Aside from right clicking, another way to change between these options would be using the task mode column. To switch,select a task and click on the drop down menu of the icon for Manually Scheduled task or Auto Scheduled. As I stated earlier, the push pin signifies Manually Scheduled and the blue rectangle with a right pointing arrow is Auto Scheduled.
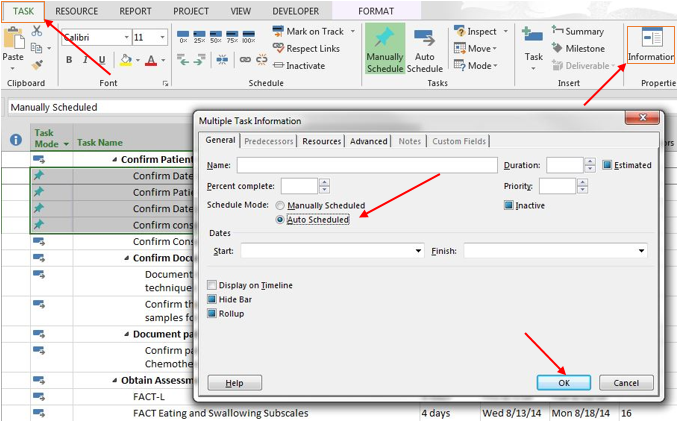
Lastly, another way to change a Manually Scheduled task to Auto Scheduled would be in the task information box.
To use this, select the task (or tasks) and click on the Task tab and under the project section, click on the Information button.
Side Note: This is a great way to bulk edit tasks in MS Project with similar properties.
The Information task provides the option to select between the two options (as pictured below), select Auto Scheduled and then click on OK.
Be sure to remember that switching to Auto Scheduled will enable MS Project to make calculations on your behalf, doing this will also ensure that there are no constraints on your project.
If you are Interested in how EPMA can help with your schedules? Contact us today at 1.888.444.EPMA or enroll for one of our training classes.
Thanks for reading, please feel free to comment, ask questions or check out our other blogs on Microsoft Project, Project Server, SharePoint and Project Management Methodology.

