There have been so many times in the past where I made several changes to my project (like adding new tasks, inactivating un-needed tasks, etc) only to find myself in a spot where it is impossible for me to know what changes I made as compared to my previous version. Luckily Microsoft heard my cries and introduced a new feature in Project 2013 – Compare Projects.
So let’s look at how to use this feature.
First, let’s say I have a project (Version1.mpp) saved with the following tasks and resources assigned to these tasks –
I open the Project and make the following changes to it –
a. I change insert a new task – Task 5
b. I assign Parthiv to this new task.
c. I will remove task 3.
d. I will change the duration of Task 2 to 5 days
So the updated Project will look like this –
I will save the updated project as Version2.mpp. Now let’s Compare the 2 projects.
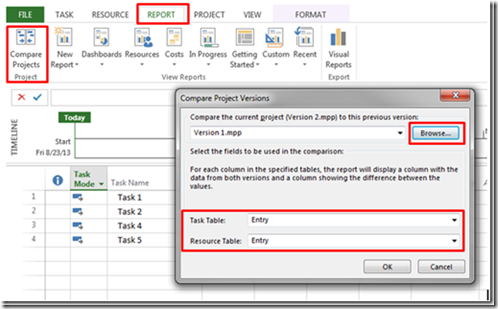
Click on the ‘Report’ tab and then click on ‘Compare Projects’. The compare Projects dialog box pops up. Browse to the project you want to compare it to and then select the task table and resource table.
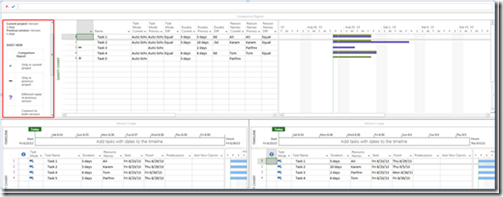
It will take a few seconds to process the information, but at the end it will provide you with a report like the one below
This report will show you the difference between the two projects. It also has a legend on the left side of the page.
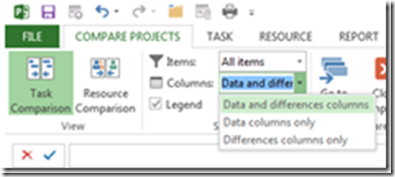
You also have different views that can be used to filter out unwanted items


