In my previous blog post, I showed you how to easily determine if you have AutoFilter applied on one or more columns of data, even if those columns are not displayed in the current view. I learned this “nugget” from a class I taught recently for some new team members at EPMA. During this class, we also took a deeper look at how the AutoFilter feature is enabled in Microsoft Project 2013.
As a result of this class, I want to take you deeper into the world of AutoFilters in Microsoft Project. AutoFilter is enabled by default both the 2010 and 2013 versions of the software. To use AutoFilter on any column of data, click the pick list arrow button in the column header of the column whose data you want to filter. For example, notice in the following figure that I am ready to use AutoFilter in the Resource Names column.
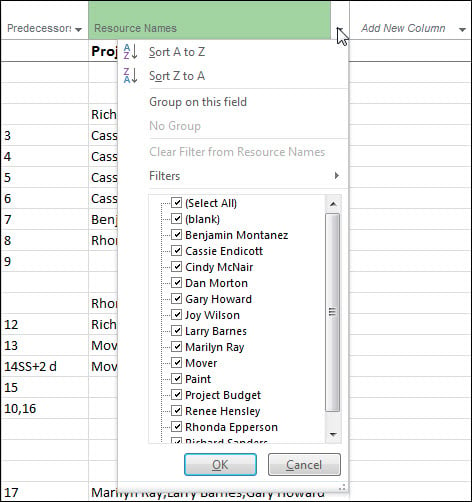
To use the AutoFilter feature, deselect the (Select All) checkbox, select the checkboxes for the values upon which you want to filter, and then click the OK button. To quickly remove the AutoFilter, press the F3 function key. By the way, this shortcut key removes any type of filtering you have applied in a project, including standard filtering, highlight filtering, and AutoFiltering.
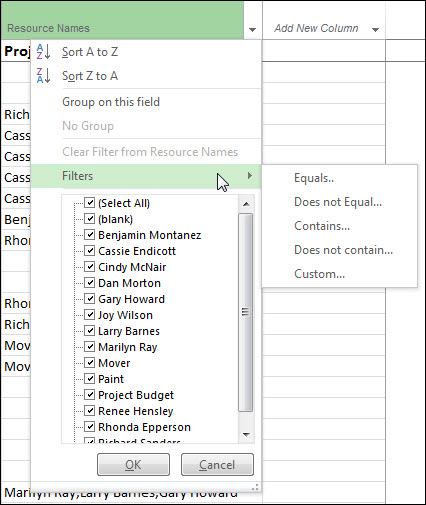
If you look closely at the AutoFilter menu shown in the previous figure, notice that this menu contains a Filters flyout menu that offers you additional filtering capabilities for the data in the Resource Names column. When I click the Filters flyout menu, notice in the following figure that I can apply five different types of pre-set filtering, including the Equals, Does Not Equal, Contains, Does Not Contain, and Custom filters.
When I select one of these filtering options, Microsoft Project displays the Custom AutoFilter dialog with the relevant information entered in the filter fields. For example, the following figure shows the Custom AutoFilter dialog when I selected the Contains item on the Filter flyout menu. Notice that the Custom AutoFilter dialog is pre-set to filter the data in the Resource Names column using a Contains filter. To use this dialog, I must enter or select my filter data in the relevant filter fields, and then click the OK button.
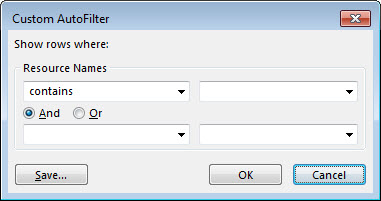
Notice in the preceding figure that the Custom AutoFilter dialog also contains a Save button. After I enter my custom filtering values in the dialog, clicking the Save button allows me to save my custom AutoFilter information as a Standard filter. For example, suppose that I want to filter for tasks assigned to either Gary Howard or Marilyn Ray. After entering the appropriate filtering data in the Custom AutoFilter dialog, I click the Save button. Microsoft Project displays the Filter Definition dialog shown in the following figure.
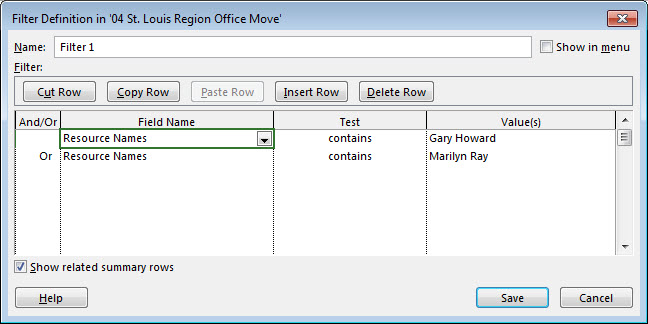
Notice in the Filter Definition dialog shown in the preceding figure that the new filter uses the filter criteria I entered in the Custom AutoFilter dialog, including applying the Boolean “Or” condition as well. To save the AutoFilter criteria as a Standard filter, I simply need to enter a name for the new filter in the Name field, optionally select the Show in menu option if desired, and then click the Save button. Microsoft Project saves the new Standard filter in the current project, but it does not save it in the Global.mpt file.
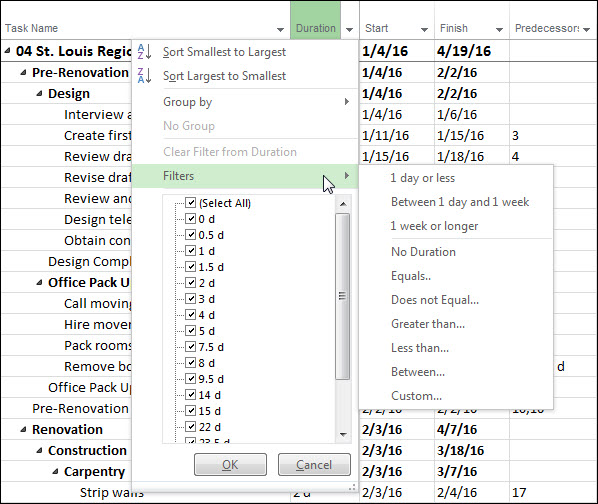
What I find so interesting about the Filter flyout menu is that the filtering options on the menu are relevant to the type of data contained in the column in which you are applying AutoFilter. For example, the following figure shows the Filter flyout menu when I apply AutoFilter to the Duration column. Notice that the flyout menu contains additional filtering options beyond those found when filtering the Resource Names column. For example, I can filter for every task whose Duration value is between 1 day and 1 week. Or I could filter for tasks that have no Duration value, meaning that they are unscheduled Manually Scheduled tasks.
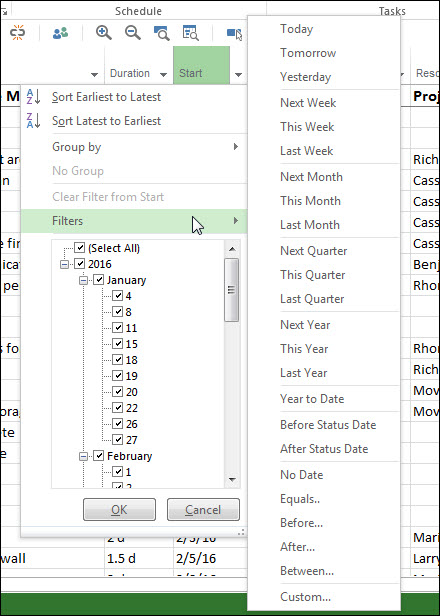
Microsoft Project offers an even more impressive list of filters on the Filters flyout menu when I apply AutoFilter to the Start column, as shown in the following figure. Notice that the flyout menu offers date-related filter options for days, weeks, months, quarters, and years. It even offers unusual filters related to the current date (the Year to Date filter) and the Status date (the Before Status Date and After Status Date filters). In addition, it offers a filter to detect tasks that have no Start date value, meaning that they are unscheduled Manually Scheduled tasks.
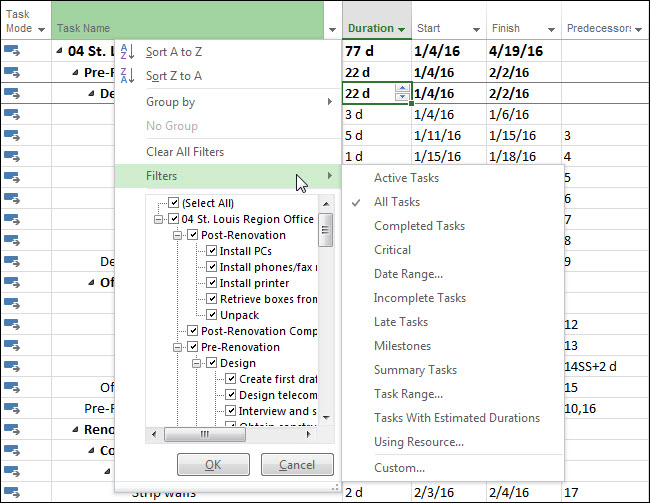
When you apply AutoFilter to the Task Name column, Microsoft Project displays a list of commonly used task filters on the Filters flyout menu, as shown in the following figure. You may recognize that these are the same filters shown on either the Filter pick list or the Highlight pick list in the Data section of the View ribbon.
As you work with the Filters flyout menu on the AutoFilter pick list, remember that the flyout menu contains a list of pre-set filters relevant to the type of data displayed in the column in which you have AutoFilter applied. In some cases, you may see only a few flyout menu items, while in other cases you may see many items.
Did this blog post help you? Would you like to learn more about how to effectively use Microsoft Project, Microsoft Project Server, or Project Online to manage your projects? If so, please consider scheduling a private training class for your project managers, taught by one of our expert trainers from EPMA. And don’t forget to follow us on Twitter, LinkedIn, and Facebook.

