Introduction
Microsoft introduced the PowerApps service back in November 2017. This service allows administrators to build apps that can run on a browser or phone or tablet with no coding knowledge needed. PowerApps has drag and drop features and Excel like expressions that enables end users to work with data.
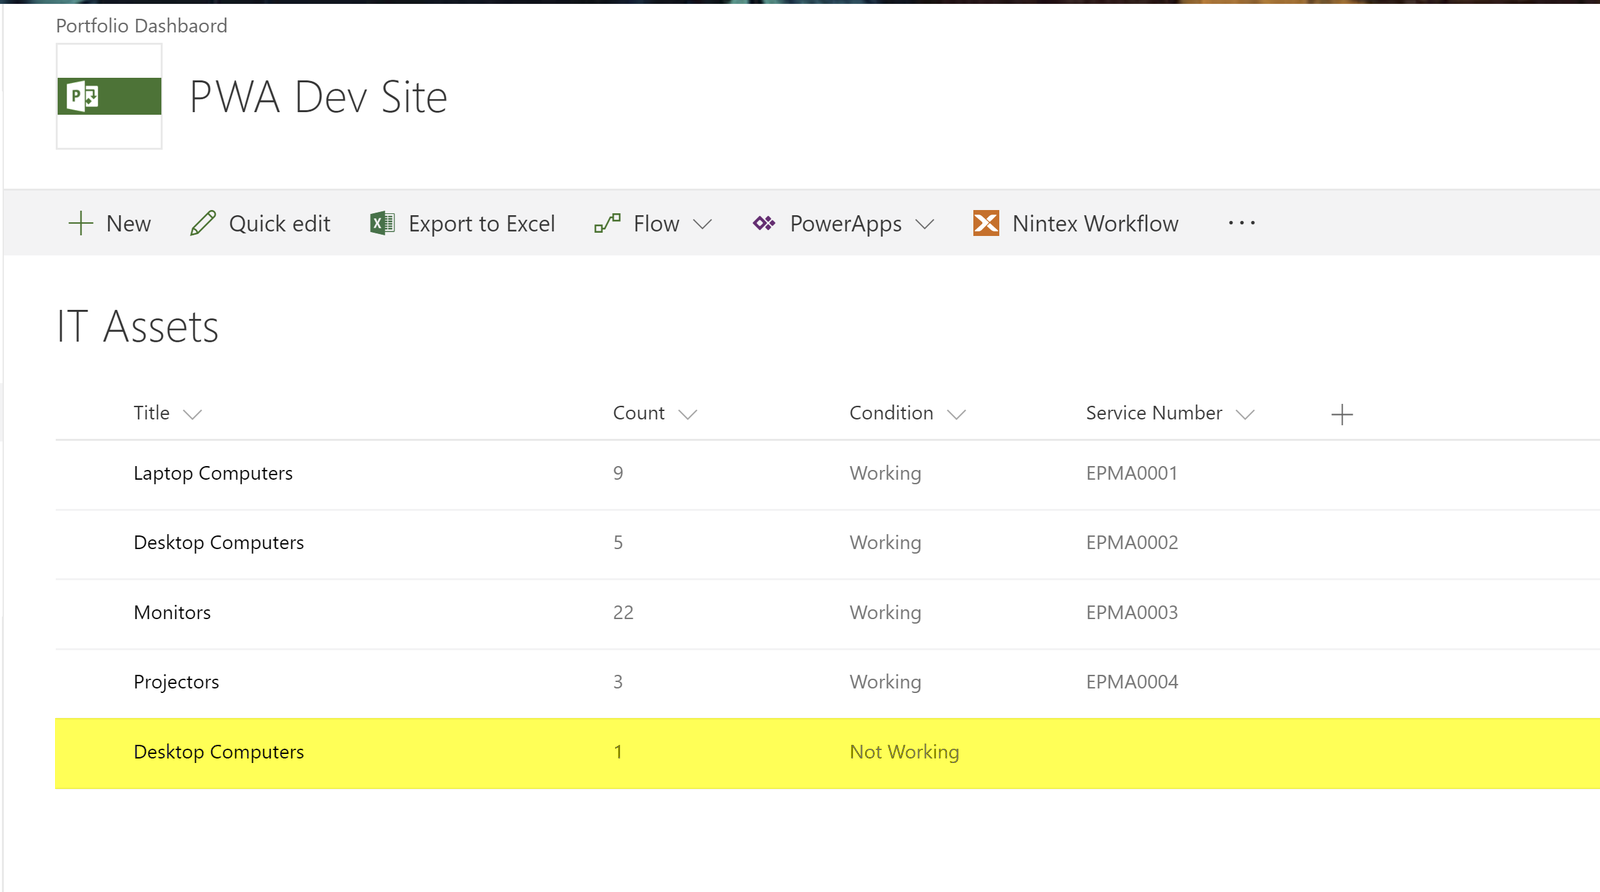
In this blog, I will show how to create a PowerApp using a simple IT Assets SharePoint list. This App would be useful to IT departments that need to add IT Assets on the go. For example, it would allow users in different locations to update inventory using smartphones.
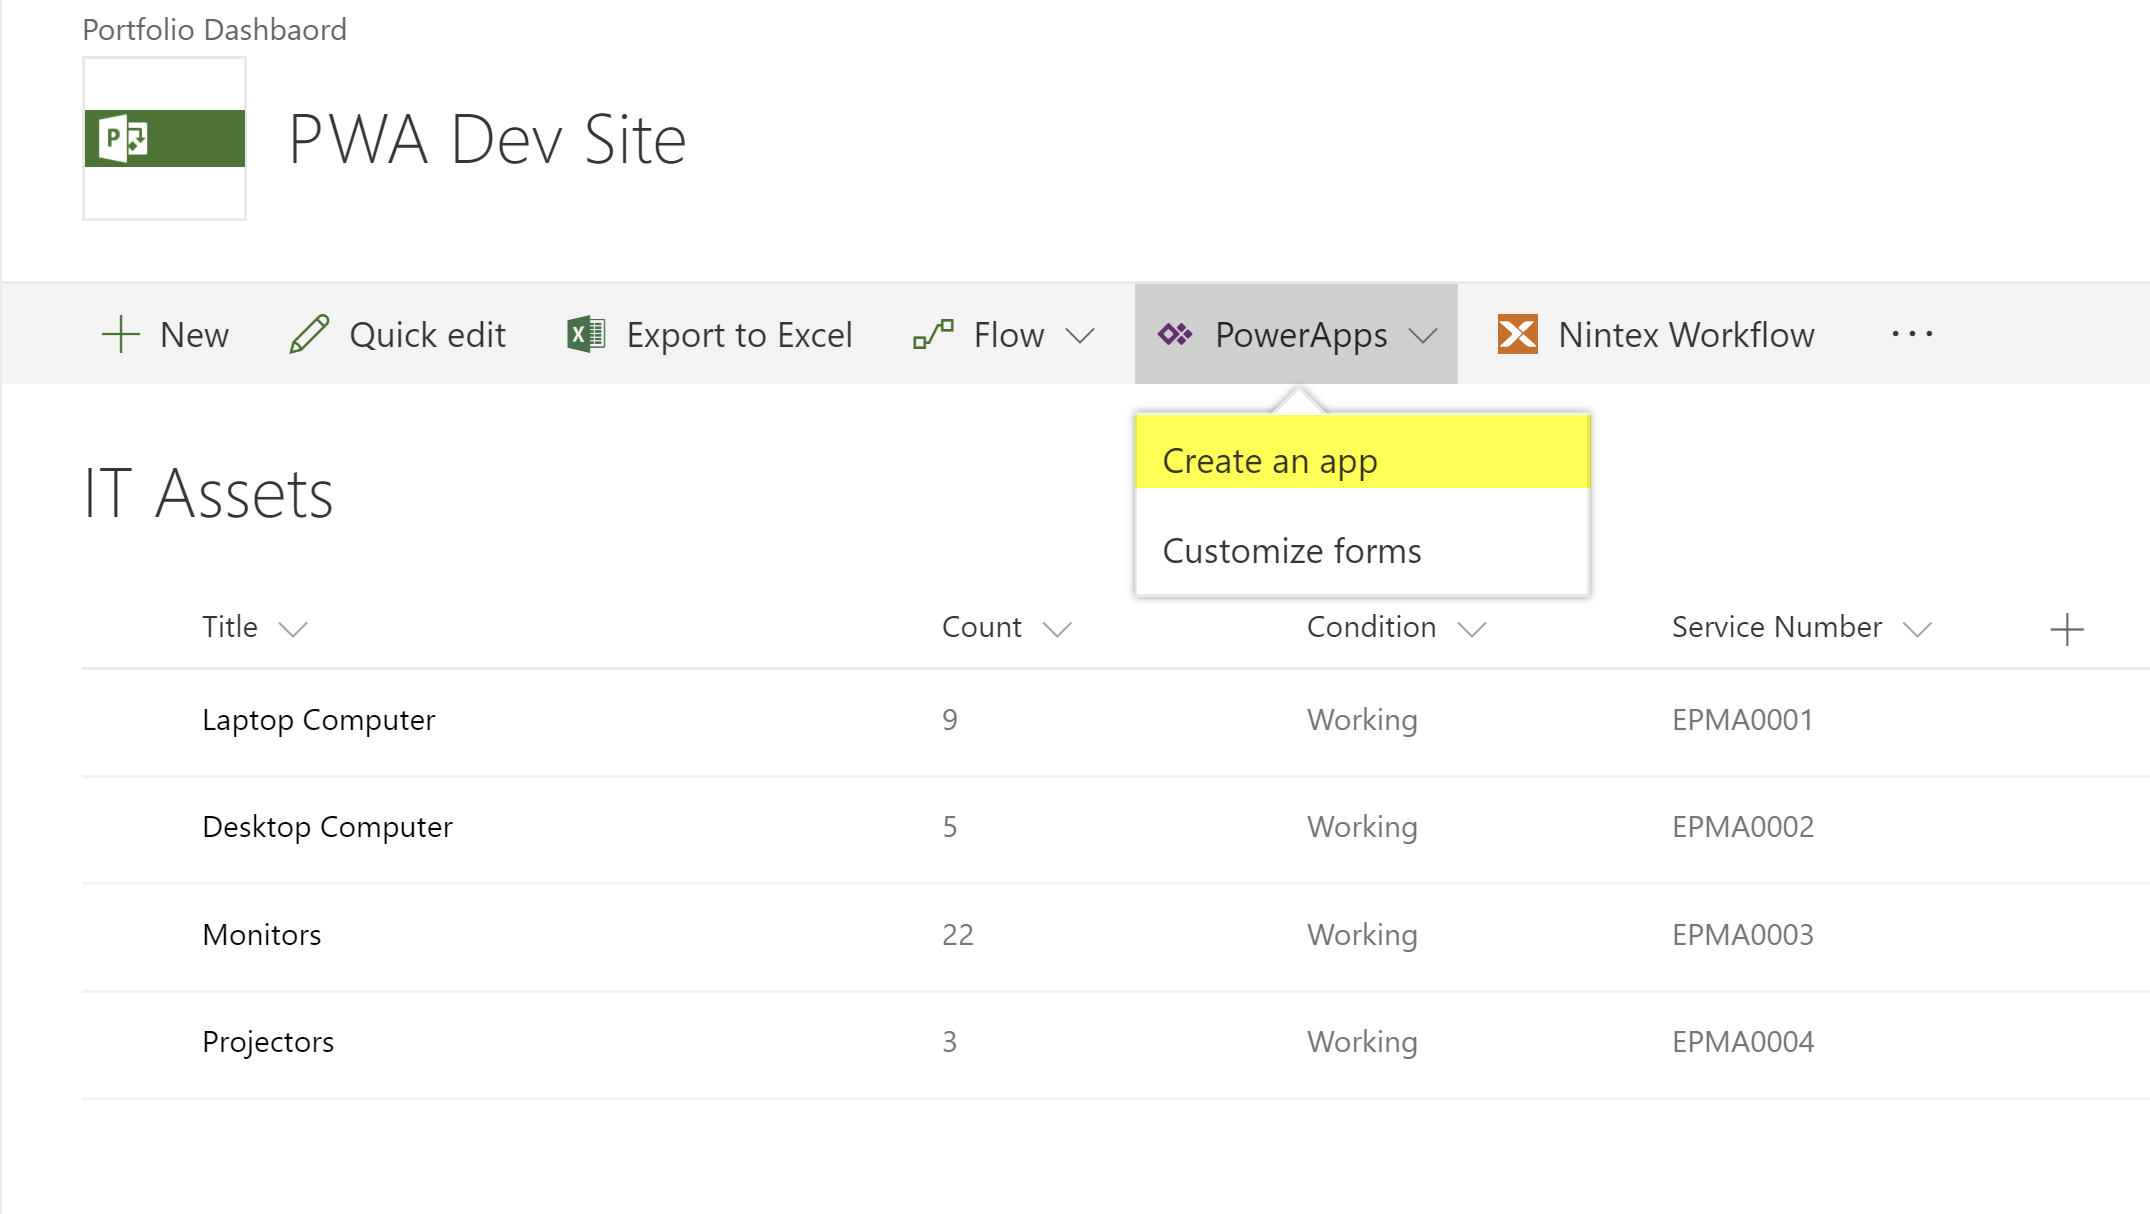
First, we need to open the list and click on PowerApps → Create an App as shown below:
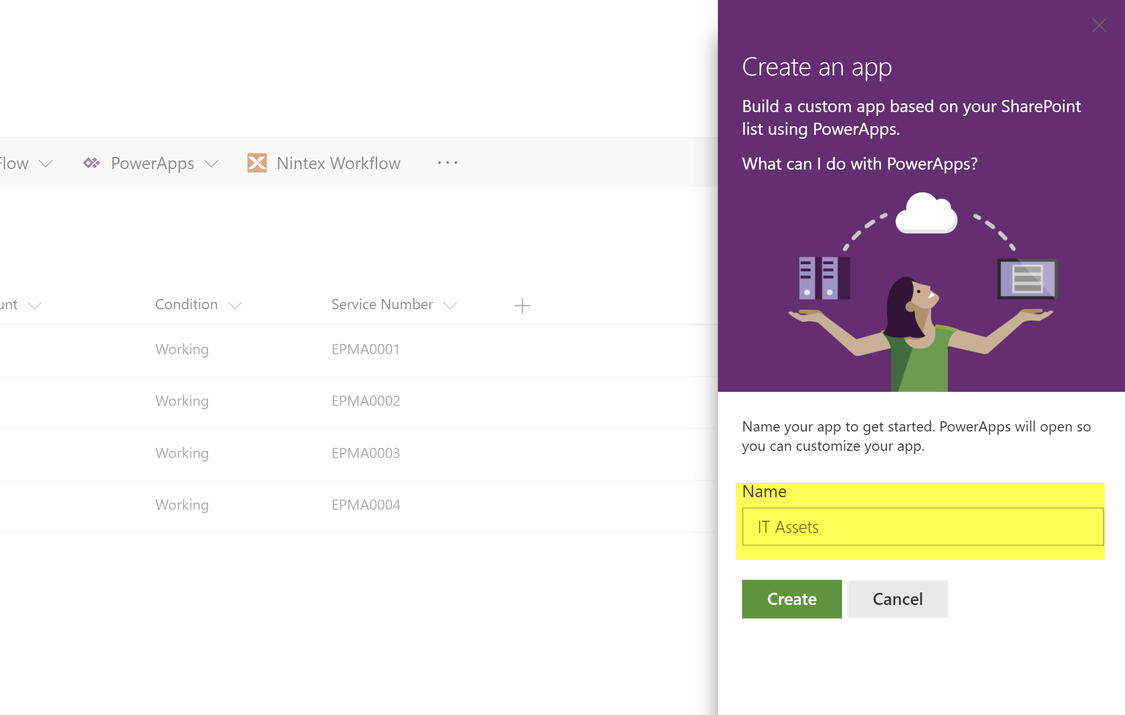
You will then be presented with a screen on the left side where you can enter the App name, and then click on create:
A new screen will open, and the list schema and data will automatically load into your PowerApp editor allowing you to edit the Apps’ look and behavior, such as formulas, conditions, and themes.
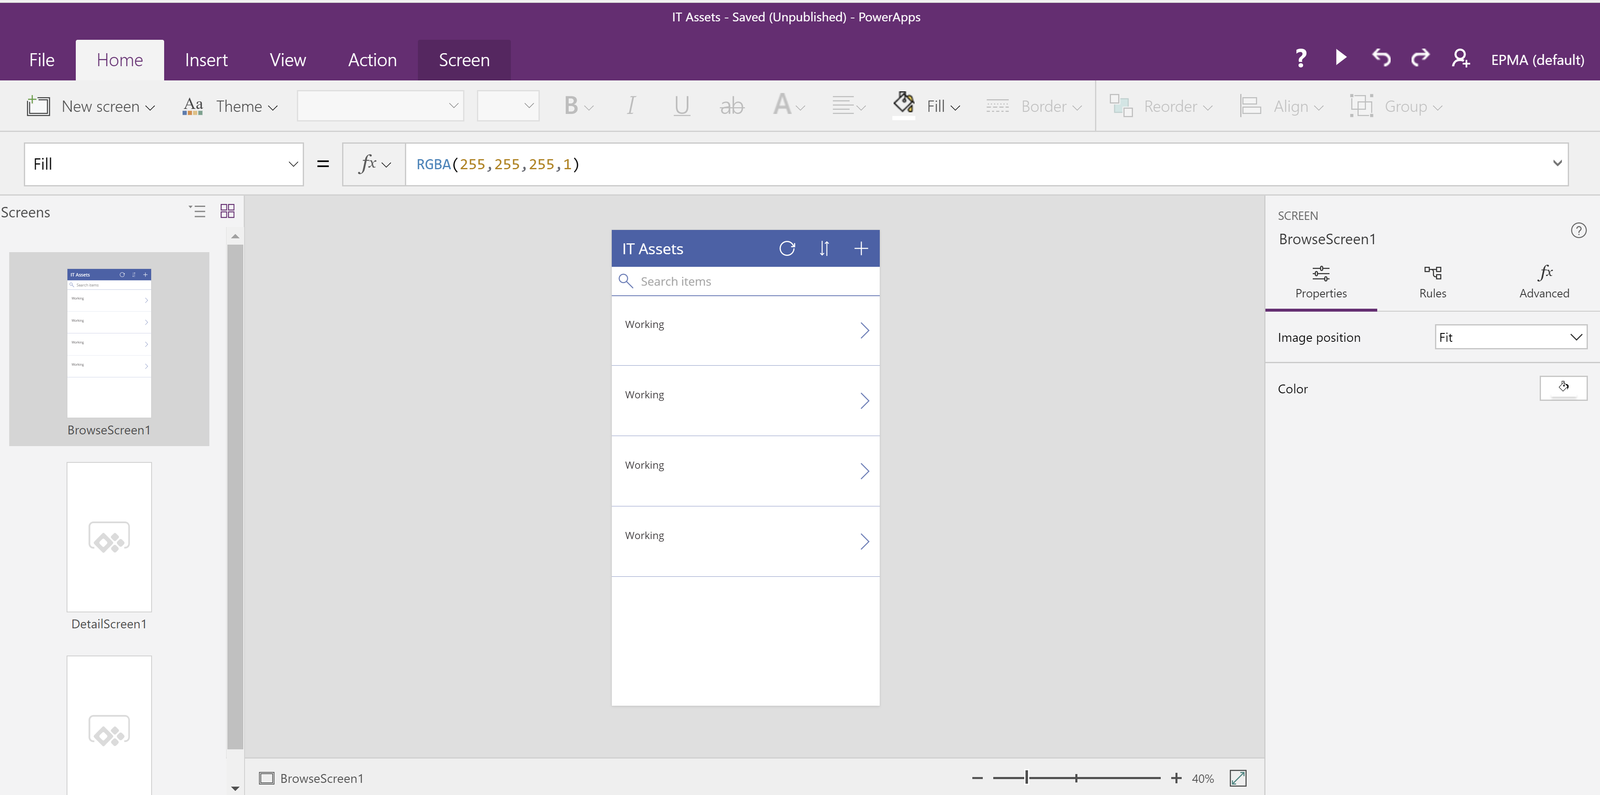
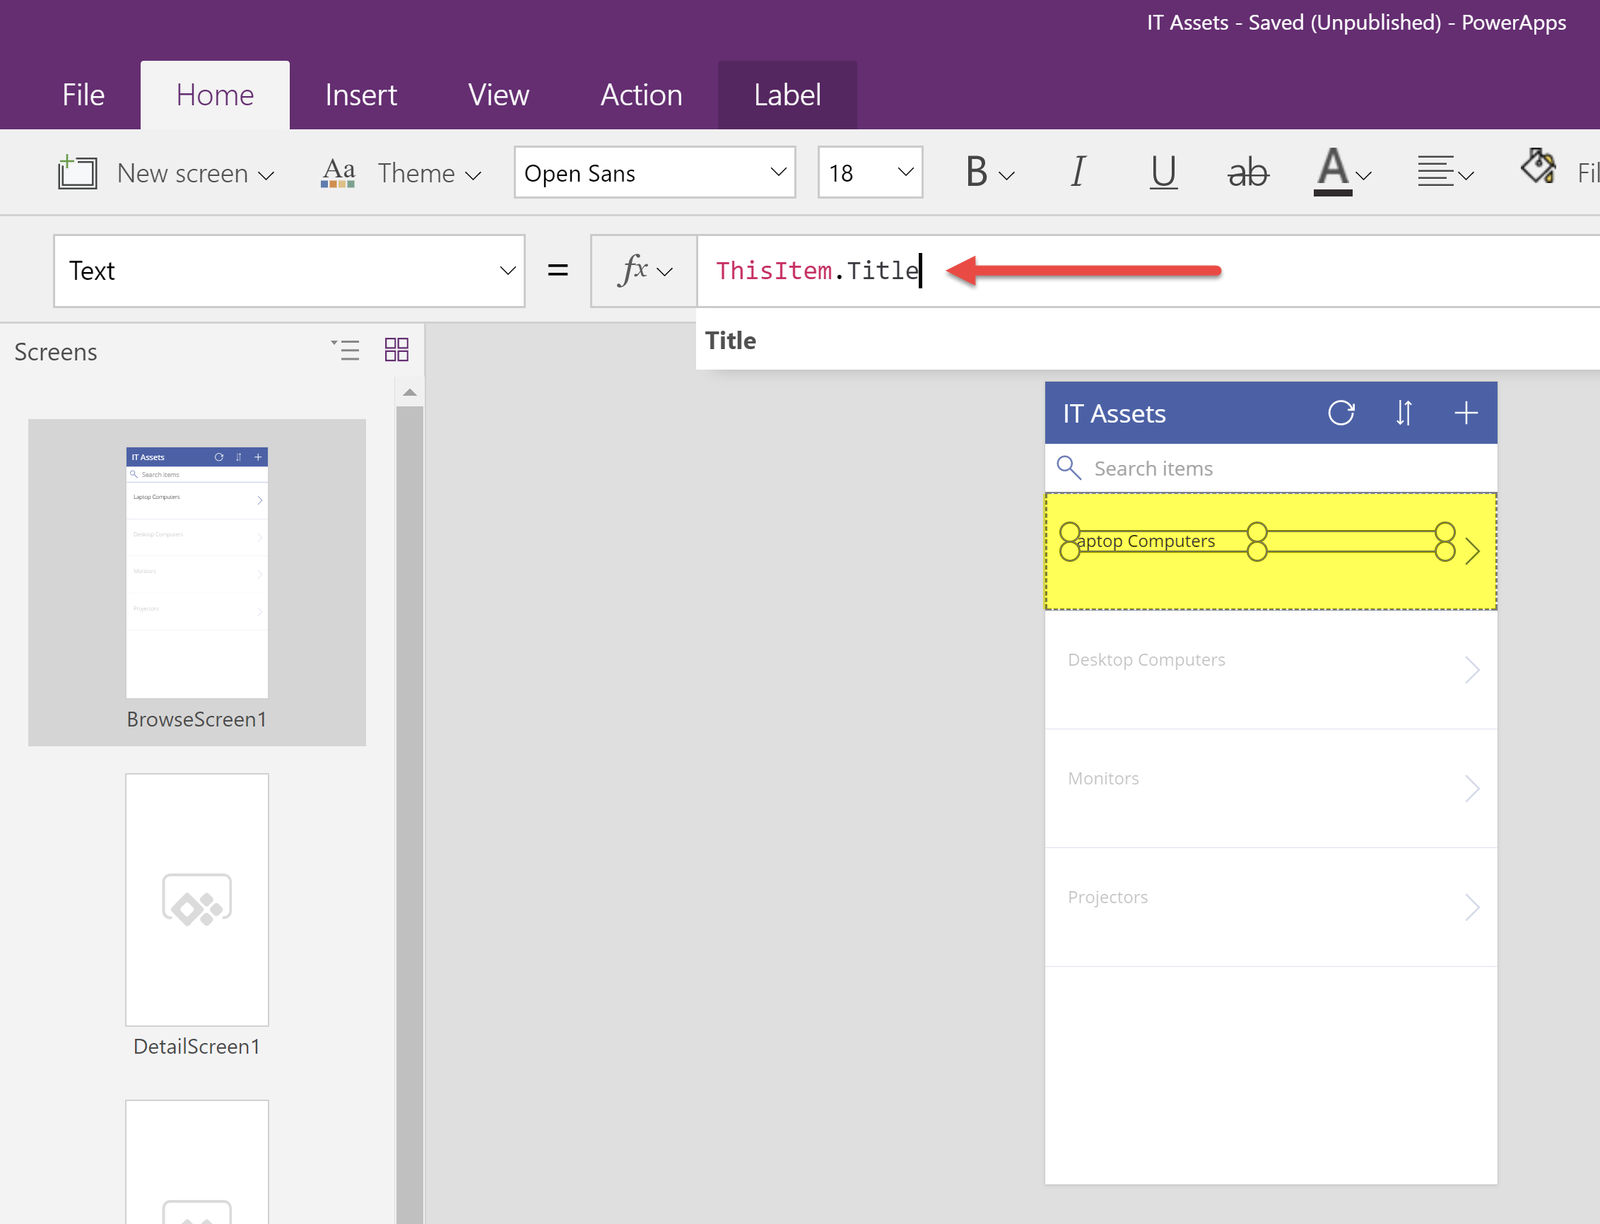
We can see the App automatically showing the “Condition field” in the previous image “Working, Not Working.” To change, select the first item “highlighted in yellow” and change the field by starting to type the field you want to show by default instead:
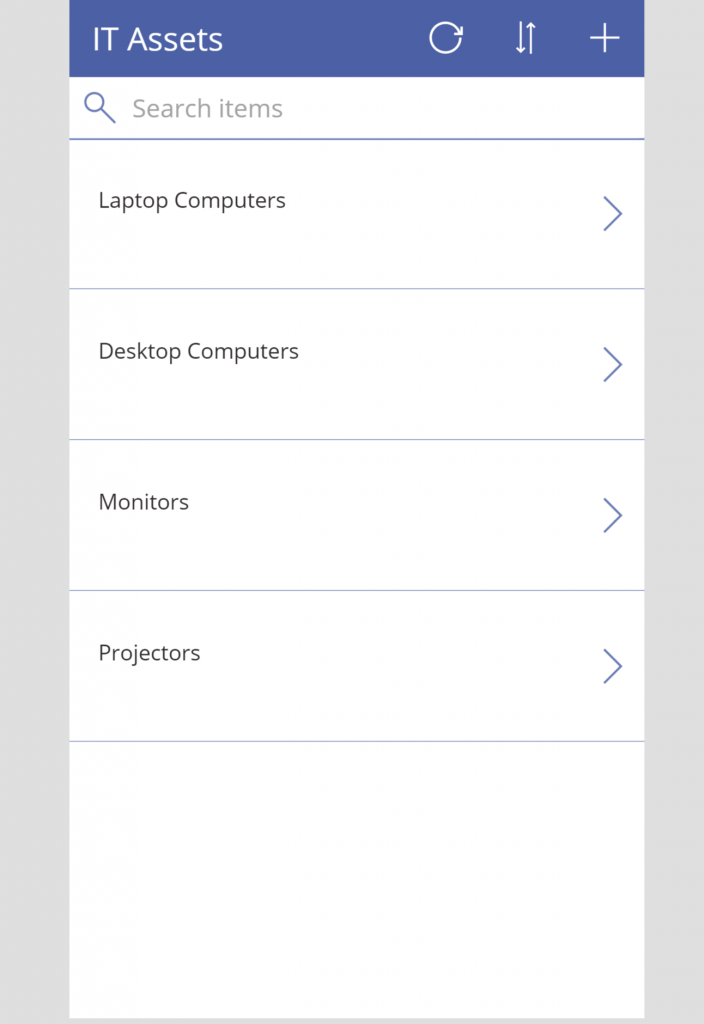
You then want to test the app by pushing “F5” on your keyboard to run the app:
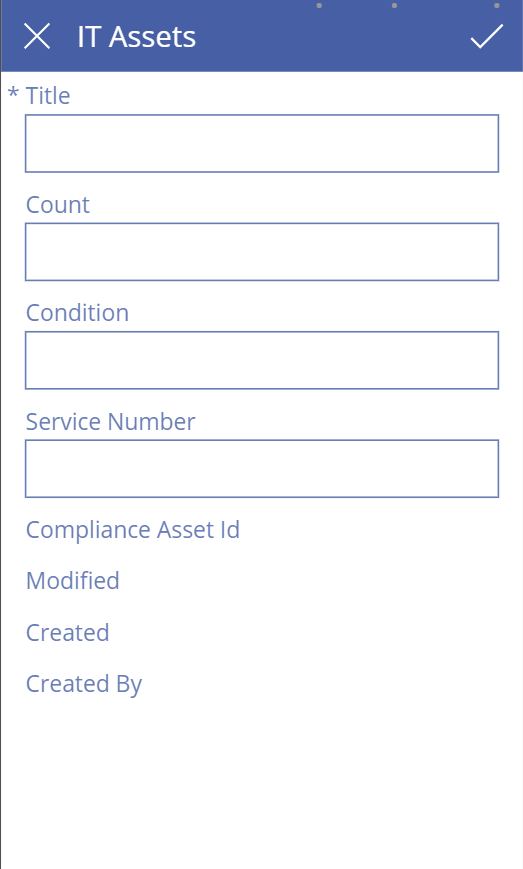
You can now add a new item to test the app when clicking the add item icon on the top right of the app:
You can go back to your SharePoint list to confirm that the App added the item back to the SharePoint list.
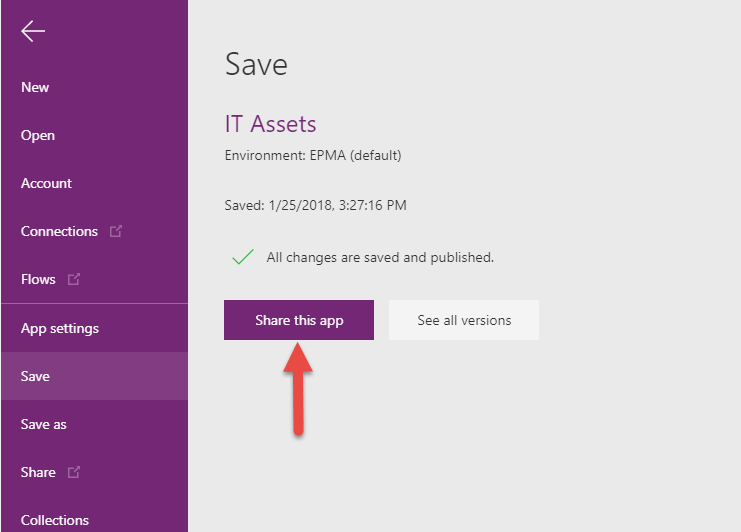
Once you have done with the changes/edits you will be able to publish and share your app on the File Tab.
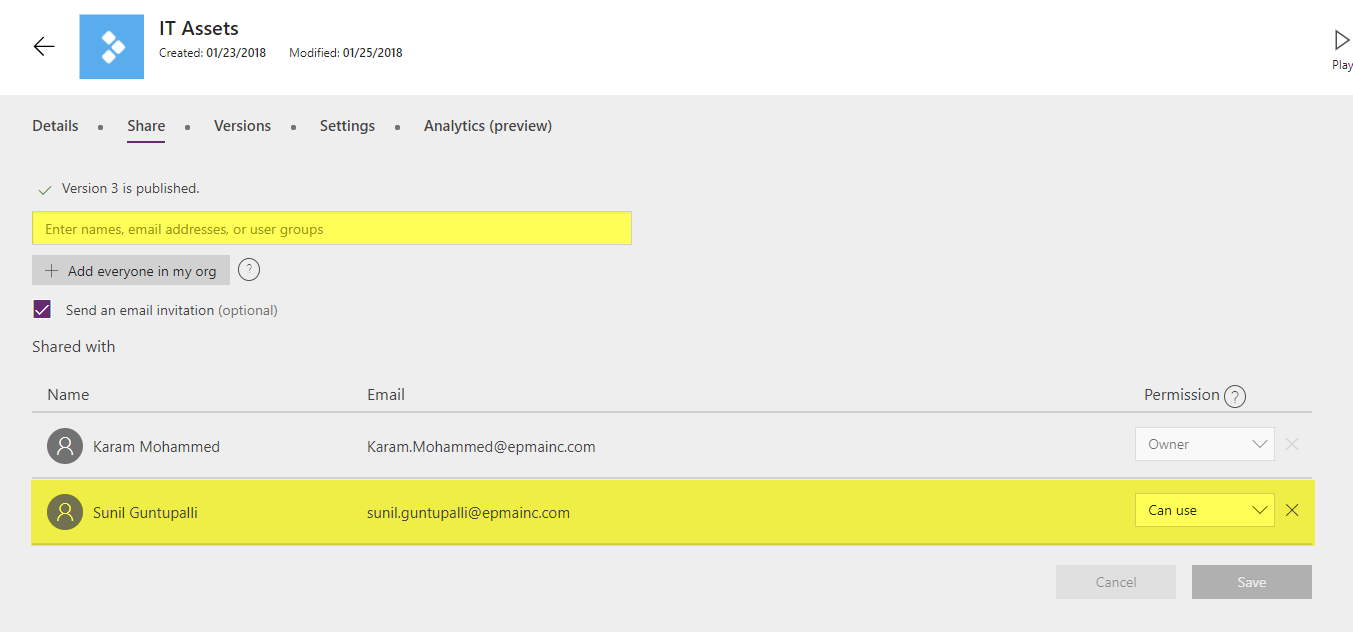
After adding the users, you want to share the App with, they will be able to access the App after downloading the Microsoft PowerApps App on IOS, Android or windows.
For more details & kick start your project management journey, sign up for our Microsoft Training Classes or send us an email.
I hope you find this blog post helpful. For more tips and tricks on Project Management, please visit www.epmainc.com

