
Background
In a recent post in the Project Online General Questions and Answers user forum, a Project Server administrator asked us to confirm that the best practice for controlling permissions for a user is to add the user to one or more security Groups, as needed. I answered his question in the affirmative; yes, the best way to control user permissions is to add the user to the security Groups that grant the permissions needed by that user. I stated that setting permissions for each individual user creates a security environment that is difficult to manage. The Project Server administrator then followed up to my reply, stating that he just inherited a Project Server instance in which the previous administrator set individual permissions for EVERY user account! He also stated that his organization is having all kinds of permissions problems because of this.
To resolve this problem, the Project Server administrator will need to clear the permissions for each user account individually, and then add each user account to the appropriate security Groups. Clearing the permissions for each user account is time consuming, but there is a way to speed up the process by using a custom security template.
Creating a Security Template
Before you can clear user permissions using a security template, you must first create the custom security template. To do this, complete the following steps:
1. Log into Project Web App with Administrator permissions.
2. Navigate to the Server Settings page in Project Server 2010 or to the PWA Settings page in Project Server 2013.
3. In the Security section of the page, click the Manage Security Templates link. The software displays the Manage Templates page shown in the following figure.
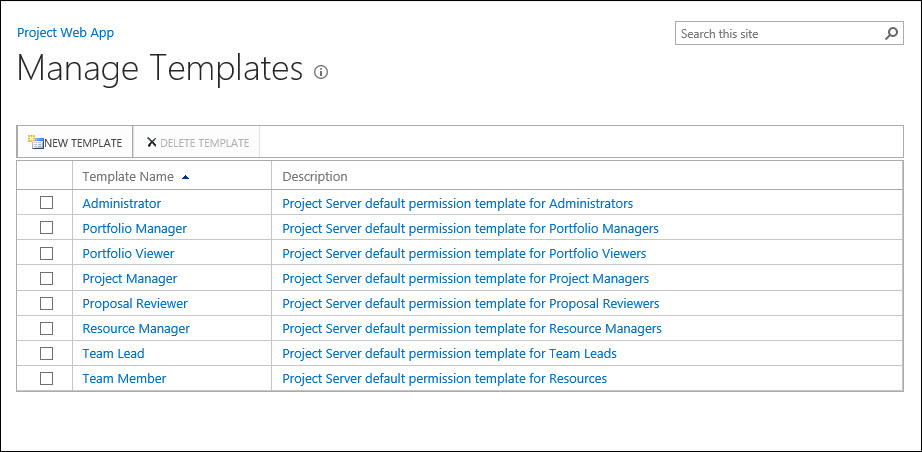
4. On the Manage Templates page, click the NEW TEMPLATE button. The software displays the Add or Edit Template page shown in the following figure.
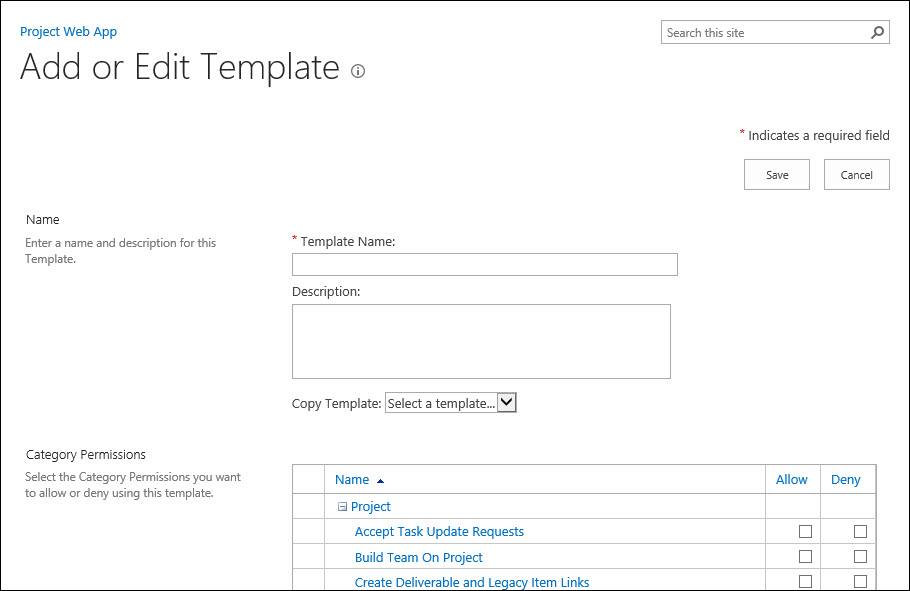
5. On the Add or Edit Template page in PWA, enter a name such as No Permissions in the Template Name field.
6. Enter a brief description of the template in the Description field and then click the Save button.
Notice from the preceding steps that the new security template has no permissions set whatsoever. Because of this, using this new security template makes it much easier to clear the permissions for an individual user account.
Clearing Permissions for a User Account
When a Project Server administrator adds Categories for a user account and sets permissions in the Global Permissions section of the page, all of these actions constitute an override to the permissions granted by the security Groups for that user account. Doing this creates a much more complex security environment to manage. Therefore, to simplify the security environment, the Project Server administrator must do the following:
- Remove any security Categories added to the user account.
- Clear the permissions in the Global permissions section of the page using the new security template.
To clear the permissions for an individual user account, complete the following steps:
1. Navigate to the Server Settings page in Project Server 2010 or to the PWA Settings page in Project Server 2013.
2. In the Security section of the page, click the Manage Users link. The software displays the Manage Users page.
3. Click the name of a user account to open it for editing.
4. Scroll down to the Security Categories section of the page and expand the section if necessary. Notice in the following figure that the Project Server administrator has erroneously added the My Projects and My Resources categories to the Selected Categories list for the selected user account.
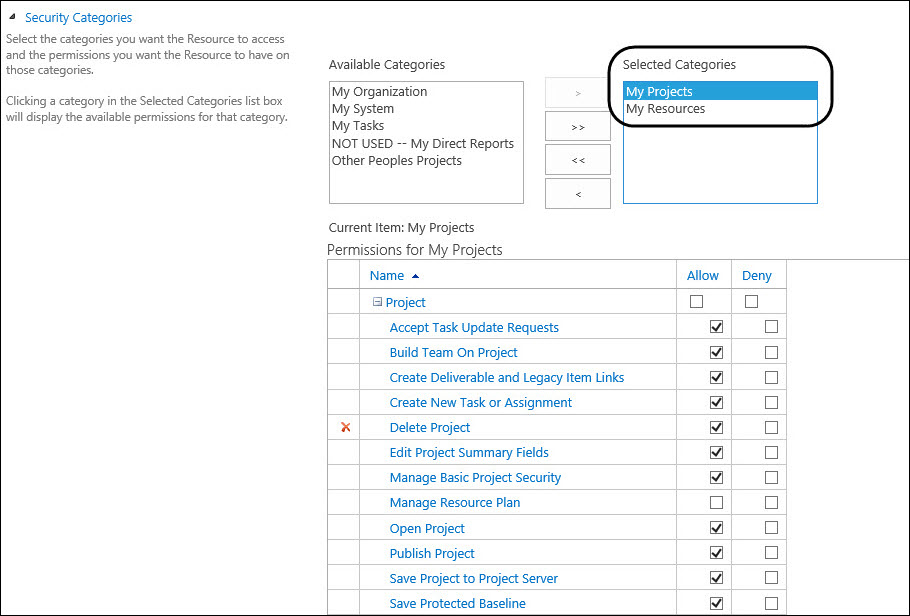
5. Click the << button to remove all of the Categories shown in the Selected Categories list.
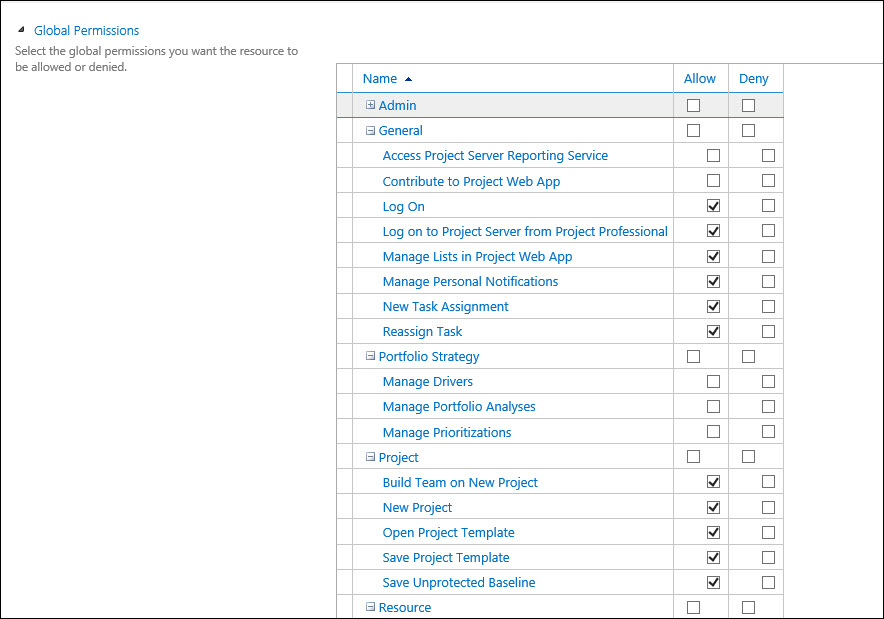
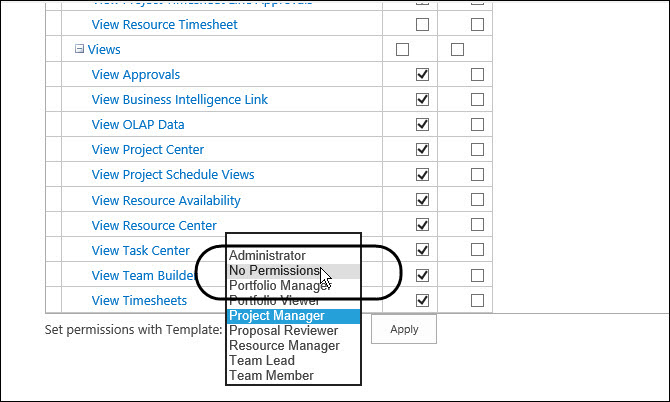
6. Scroll down to the Global Permissions section of the page and expand this section, if necessary. Notice in the following figure that the Project Server administrator has erroneously specified individual permissions for the selected user account.
7. Scroll to the bottom of the Global Permissions data grid.
8. Click the Set permissions with Template pick list and select the No Permissions custom security template, such as shown in the following figure.
9. Click the Apply button to apply the No Permissions template and remove every permission set in the Global Permissions data grid.
10. Scroll to the Security Groups section of the page and add the user account to the correct security Groups.
11. Click the Save button.
12. Repeat this process for every user account in which Categories have been added or permissions specified in the Global Permissions section of the Edit User page.
Recommendations
KISS (“Keep It Simple, Silly!”) is the mantra for setting up and managing your Project Server security model. As much as is possible, you should control security using the built-in Groups and Categories. When needed, you can always create custom Groups and Categories for unique security needs. Only in the rarest of cases should you ever manually add Categories to a user account, or specify permissions in the Global Permissions section of the page for a user. Remember that every time you specify custom permissions for a user, you are overriding the default permissions granted by the Groups to which the user belongs, and you are creating a more complex security model which you must remember and must ultimately manage.
Did this blog post help you? Would you like to learn more about how to effectively use Microsoft Project, Microsoft Project Server, or Project Online to manage your projects? If so, please consider enrolling in one of our upcoming open enrollment training classes.
You can take our training classes “in person” in our EPMA training center in Houston, Texas or “live-virtual” over the Internet. And don’t forget to follow us on Twitter, LinkedIn, and Facebook.
For more details & kick start your project management journey, sign up for our Microsoft Training Classes or send us an email.
I hope you find this blog post helpful. For more tips and tricks on Project Management, please visit www.epmainc.com
GAIN VISIBILITY WITH PPMVUE
Bring your Project Online data to life with PPMVUE.
Create dashboards and reports for Portfolios, Projects and more in few clicks. Ready to use out of the box and works with any configuration
Download From Office Store Learn More