
Do you see the following error message in Project Server 2013 when you try to create a new project?
Error: Your new <Project Name> has been created successfully, but failed to publish and will not be listed in the Project Center. For more information on the failure, visit the My Queue Jobs page or contact your administrator.
There might be two scenarios that can cause this error.
Scenario 1:
Problem: New Project plan creation process fails with below error message in the queue, even when using out of the box Basic Project Plan EPT.
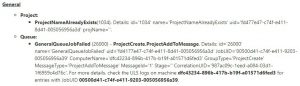
Possible Cause: This error can occur if a Project in the Project Server 2013 doesn’t have any name or it has blank name. We were unable to reproduce the Blank Project Name error in our system; however, Microsoft has announced that they fixed this error with Project Server 2013 March 2016 (KB3114836) CU. So, if you want to fix this error then download the CU and update your server.
Resolution:
- Open the PWA with Administrator access.
- Open PWA Settings, click on Delete Enterprise Objects.
- Find the name of the Project, which is unusual or which doesn’t have any name.

- Delete the Project, as well as Project Site associated with it.
- Try to create a new Project and check the behavior.
Scenario 2:
Problem: New Project plan creation process fails with below error message in the queue.
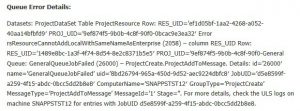
Possible Cause: The Enterprise Project Template (EPT) that is used to create the Project uses Enterprise Resources that have been deleted or converted to Users. As a best practice, you should never have “Named Resources” assigned to task on your project template, you should always use “Generic Resources” instead.
Resolution:
- Open the Enterprise Project Template (EPT) in MS Project professional. You will see the below pop up message. It will list the resources that have been deleted or converted to Users.
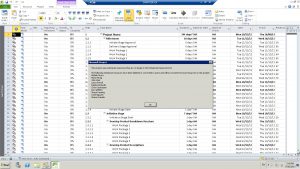
- You can remove the above resources from the EPT Resource sheet and update the template Or Convert those resources into Local Resources by clicking OK on the dialog box in the above screenshot and update the template.
- Now you should be able to create Project.
For more details & kick start your project management journey, sign up for our Microsoft Training Classes or send us an email.
I hope you find this blog post helpful. For more tips and tricks on Project Management, please visit www.epmainc.com
GAIN VISIBILITY WITH PPMVUE
Bring your Project Online data to life with PPMVUE.
Create dashboards and reports for Portfolios, Projects and more in few clicks. Ready to use out of the box and works with any configuration
Download From Office Store Learn More