
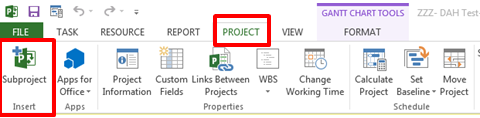
Microsoft Project allows you to link projects in a Master Project/Subproject Relationship. Here is a rundown on the steps. Open the project that will be the Master Project in Project Professional (you must be connected to the server). In the Ribbon, on the Project Tab Select Subproject
In the Insert Project dialog box you will see a list of projects you may insert as the Subproject. Select “Show me the list of all projects” and Select the project you wish to insert and Select Insert.

In the Example below, I inserted “zzz Sub Project” (Red Box) into the Master Project “ZZZ-CWT Master Project” (Yellow Box) just after the Phase 1-Pre Delivery task on Line 1. Take note of the indicator icon.

Tips to keep in mind:
- In the Task Name field, click the row below which you want to insert the subproject. You can insert a subproject anywhere in the task list of the master project and then drag and drop it like other tasks on the schedule.
- Leaving the Link to Project option selected creates a link between the 2 projects. Unchecking the option will do a 1 time Copy of the subproject into the Master Project.
- You may insert multiple subprojects by holding down the Ctrl key and clicking the subprojects in the order you want them inserted into the Master Project.
- You must have the security rights to Edit and Publish the Subproject or an error message will display when you publish the Master Project.
- If you have made a change to the Subproject, when you save and publish the Master Project, you will be asked to Save the changes to the Subproject
- When you check in the Master Project, you will be asked to Save you changes to the Subproject.
GAIN VISIBILITY WITH PPMVUE
Bring your Project Online data to life with PPMVUE.
Create dashboards and reports for Portfolios, Projects and more in few clicks. Ready to use out of the box and works with any configuration
Download From Office Store Learn More