A Project Template is an important artifact that projects should create during their closing phase. Project Templates help in quicker planning of other similar future projects which otherwise would have to be started from scratch. Creating templates save a lot of planning time as it helps the project to know the rough estimate of project duration or cost right at the start of the project. Also, templates enable us to more accurately plan for our future project and also helps identify the best practices and contingencies for the project. For the above reasons creating project templates are one of the best practices in project management community.
Creating templates in Project 2013 is not as explicit as it was in Project 2010. So here are the steps for creating Project Templates in Project 2013:
STEP 1:
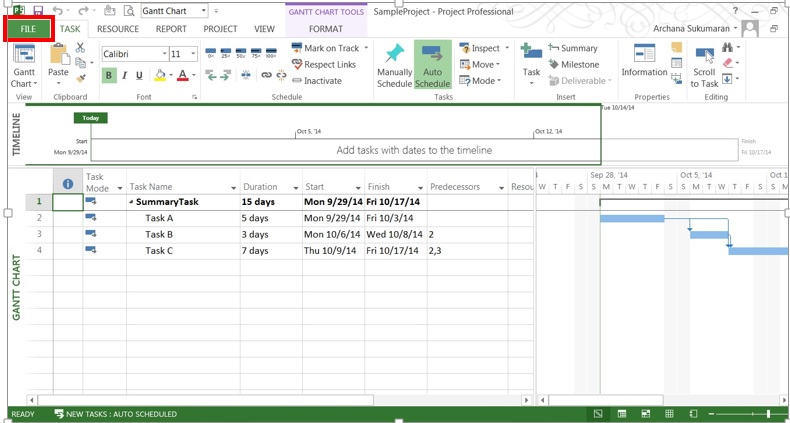
Open the project that you would want to use to create your template. Click on “File tab” on the top.
STEP 2:
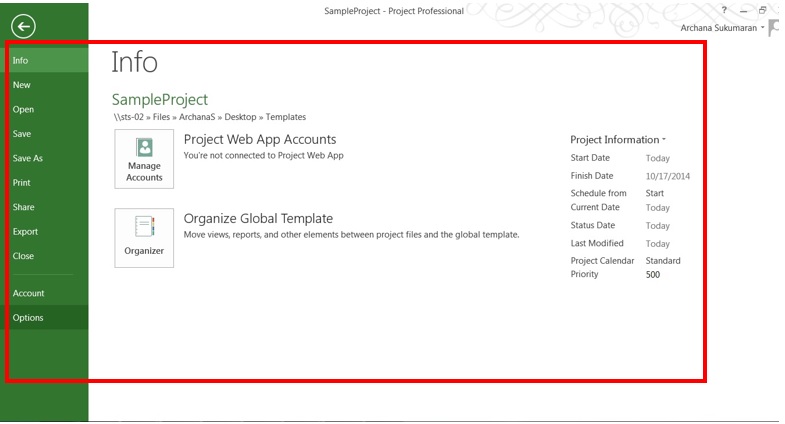
You must be able to view the backstage area of project.
STEP 3:
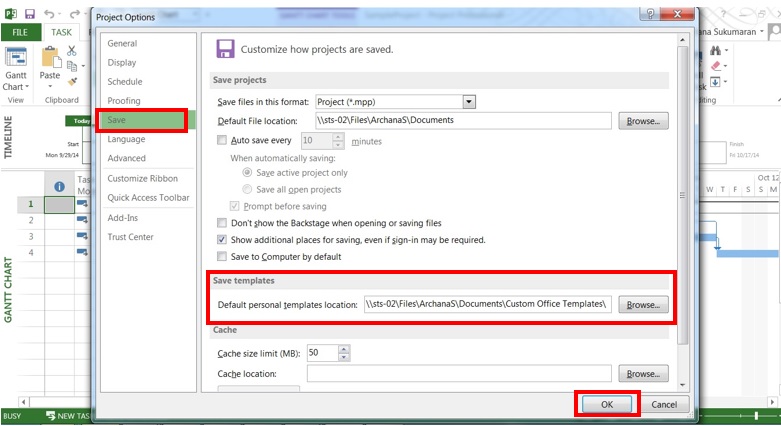
Click on the “Save” option to verify the location of the template. In the “Save templates” section verify if the file path is pointed to “Custom Office Templates”. Now, the personal list of templates will be available in this default templates location. Once you verify the path click on “OK” button.
STEP 4:
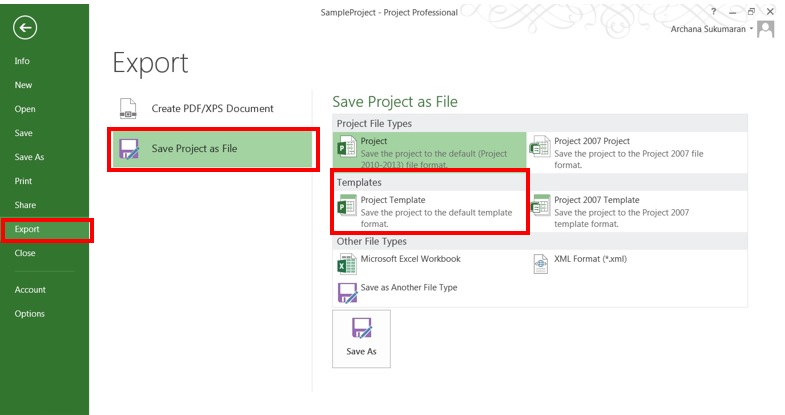
In the back stage area click on the “Export” option. Now, select the “Save Project as File” option and then click on “Project Templates” to create a Template section.
STEP 5:
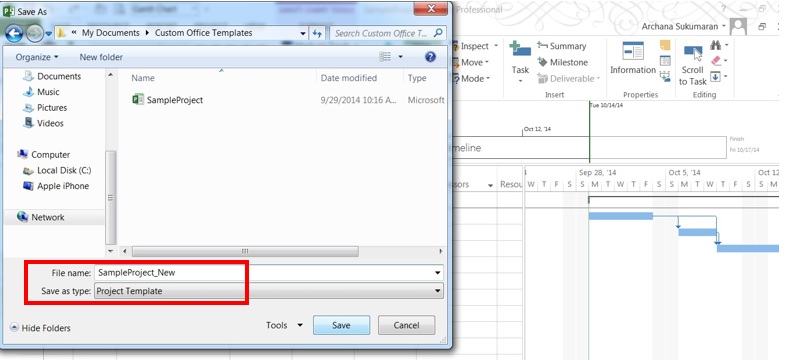
Enter the name for the template and choose the value for “Save as type” as “Project Template”.
STEP 6:
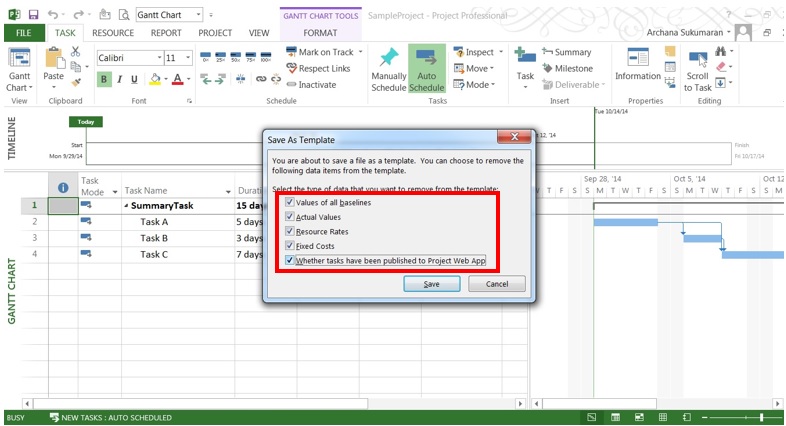
Check the following items (actual values, fixed costs, resource rates etc.) to remove those values from the project template as applicable and click on the “Save” button. This helps to remove these values from the newly created template.
STEP 7:
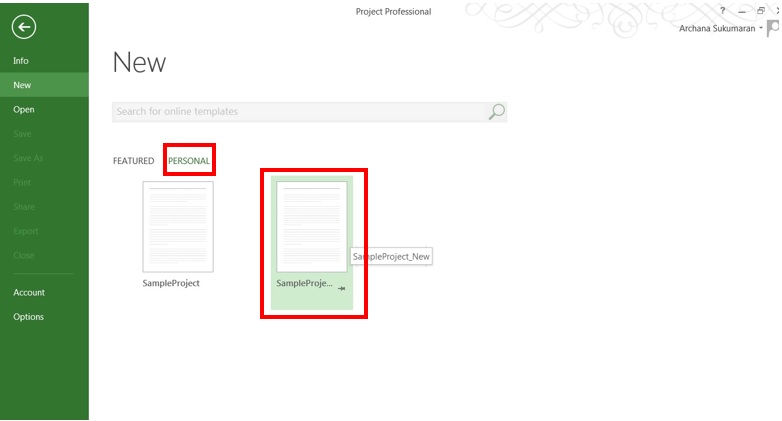
The template is now available when you create a New Project under the “Personal” tab.
STEP 8:
Enter a start date for the new project (that is to be created from the template) and click on the “Create” button. By default the project start date is the current date.

Tips:
- If we avoid using date constraints (Must start on, Must finish on etc.) while creating projects and just build the project based on logical relationships like Start-to-Start, Start-to-Finish, Finish-to-Start and Finish-to-Finish, the projects could be reused as templates more effectively.
- Remove the actual values if your project data is confidential.
- Remove the project specific notes if any, you may leave the general notes though.
Thank you very much for reading my blog. Appreciate your comments and inputs.

