
Many of you use Microsoft Project and Project Server/Project Online/PPM to schedule projects within a program. When I schedule my projects that belong to a program, I like to create a Program Master Schedule. My Program Master Schedule is basically a shell that houses the Subproject links. The screen shot below displays an example of a Program Master Schedule with two subprojects (Test Project 1 and Test Project 2).
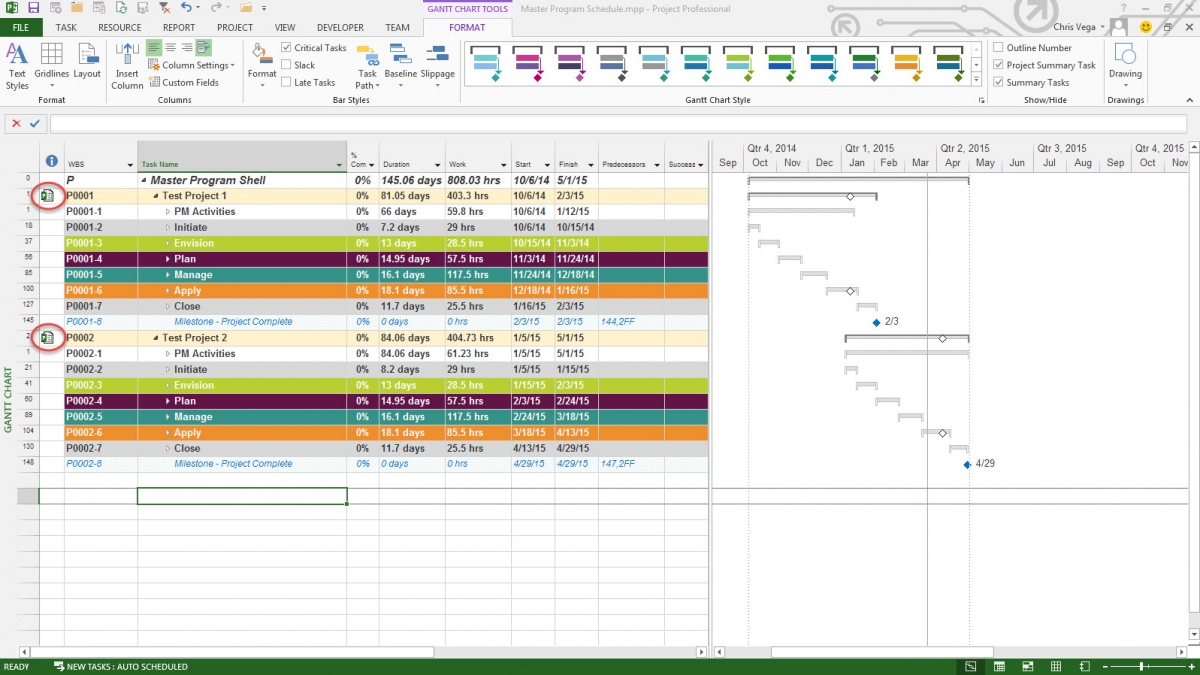
As for me, I like to insert these subprojects as an editable link into my Program Master Schedule. You can see this by looking at the subproject icons in the above screen shot. By doing this, it allows me to make a change, including adding cross-project dependencies, to all subprojects from the Program Master Schedule.
When working with my clients, some Program Managers do not want the subprojects to be editable from the Program Master Schedule. The Program Managers would rather have the Project Managers make all changes from the Project Schedule. But what happens when the Program Manager makes the decision to have all subprojects in the Program Master Schedule be Read-Only while the program/projects are in-flight?
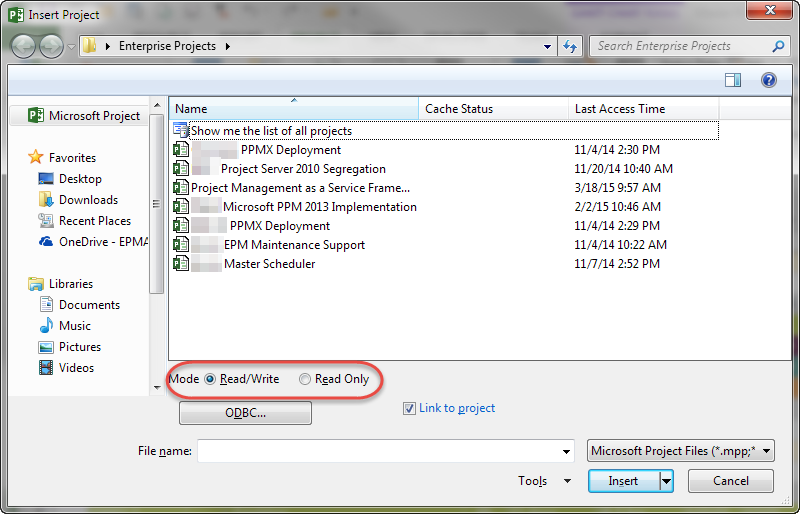
Most of us would just open the Program Master Schedule, delete the subprojects, and add them back into the Program Master Schedule as a Read-Only by selecting the appropriate Mode (Refer to the scren shot below).
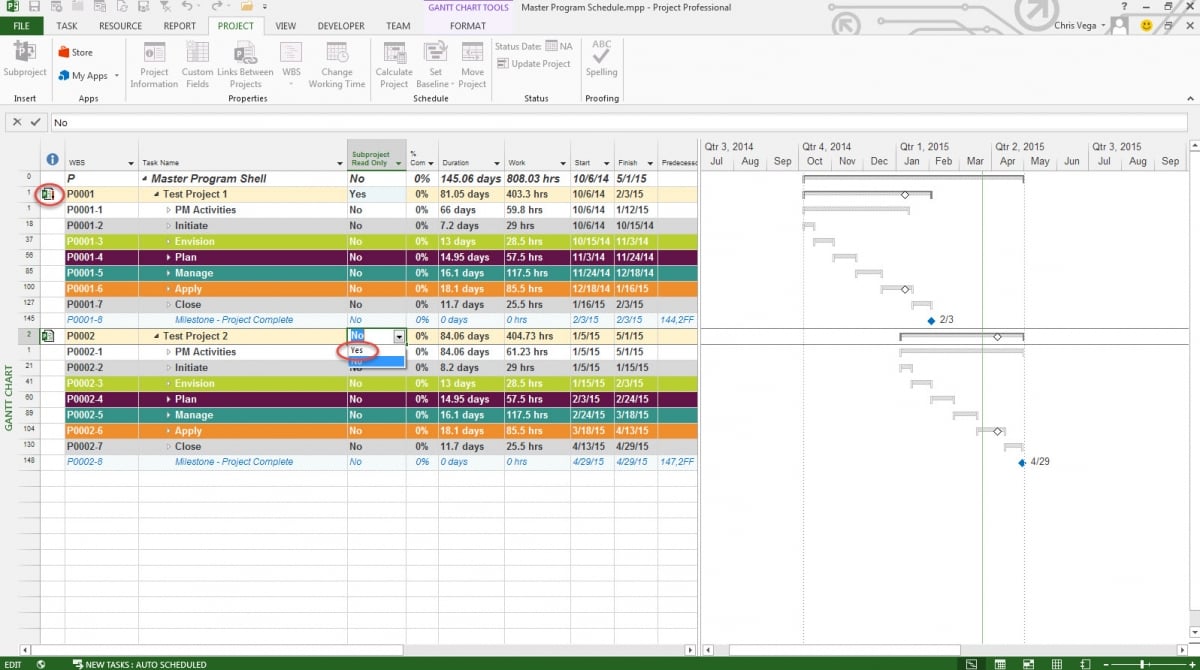
This can be an exhaustive process especially when there are many subprojects in the Program Master Schedule. Rest assured there is an easier way to convert the subprojects to Read-Only all within the Program Master Schedule… two actually. The first method is to insert a column into the Program Master Schedule called ‘Subproject Read Only’. This is a Boolean field with a Yes/No choice. Click the cell for the appropriate subproject, and select Yes (refer to the screen shot below).
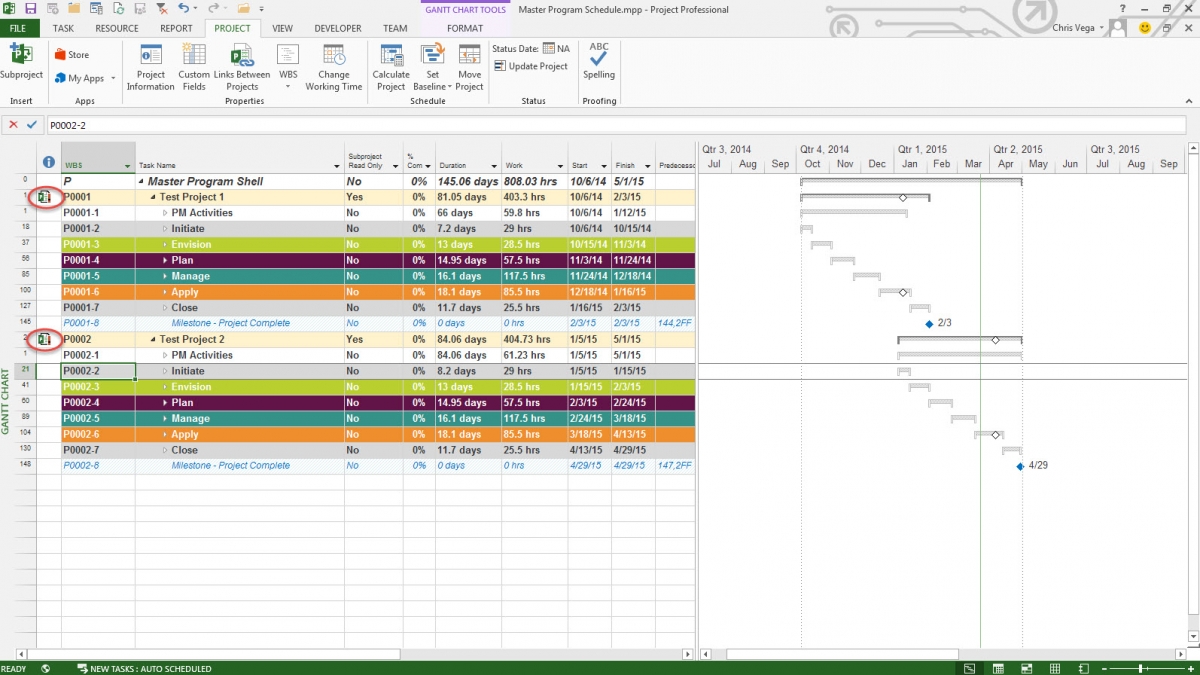
The second method is to double-click the subproject line which brings up the Inserted Project Information dialogue box. Navigate to the Advanced tab, check the box for the ‘Read-Only’ option, and click OK. You will now see that the subprojects are Read-Only by the icon with a red exclamation mark displaying (refer to the screen shot below).
Once either of these methods to convert subprojects to Read-only are completed, the last thing to do is Save/Publish your Program Master Schedule.
Thanks for reading! Please feel free to leave comments below or check out our other blogs on Microsoft Project, Project Server, SharePoint and Project Management Methodology.
Interested in how EPMA can help you with your project schedules? Contact us today at 1.888.444.EPMA or [email protected].

For more details & kick start your project management journey, sign up for our Microsoft Training Classes or send us an email.
I hope you find this blog post helpful. For more tips and tricks on Project Management, please visit www.epmainc.com
GAIN VISIBILITY WITH PPMVUE
Bring your Project Online data to life with PPMVUE.
Create dashboards and reports for Portfolios, Projects and more in few clicks. Ready to use out of the box and works with any configuration
Download From Office Store Learn More